How many different types of fire extinguishers are there?

Most people walk straight past a fire extinguisher without a second glance. It’s only when you’re standing in front of one, needing it, that you realise you have no idea which one to grab or how to use them. This guide answers exactly that. How many different types of fire extinguishers are there? Six, and they have their uses in very different scenarios.

Here’s the thing: fire extinguishers are not interchangeable. Using the wrong type on the wrong fire can make things considerably worse, and in some cases (water on an electrical fire, for instance) genuinely dangerous. In the UK there are six different types, each built for specific fire risks. Consider this your no-nonsense guide to knowing your CO2 from your wet chemical, and why it actually matters.

💡
In this guide:

  • How Do Fire Extinguishers Work?
  • Water Fire Extinguishers
  • Foam Fire Extinguishers
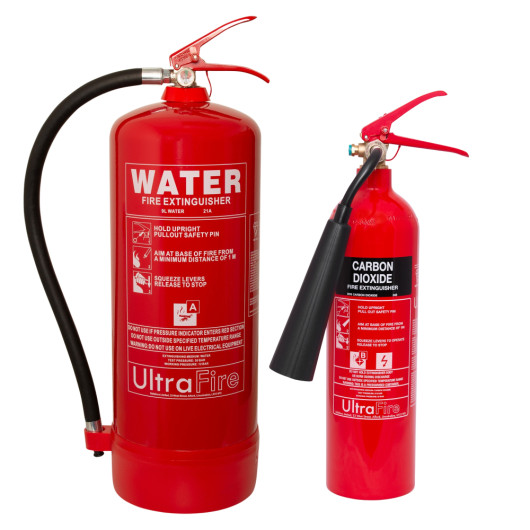
  • CO2 Fire Extinguishers
  • Powder Fire Extinguishers
  • Wet Chemical Fire Extinguishers
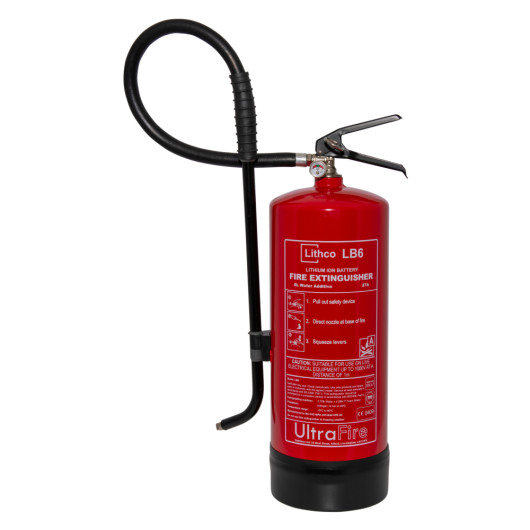
  • Lithium-ion battery extinguishers
  • How Many Fire Extinguishers Do I Need?
  • Fire Extinguishers Explained
  • Choosing the Right Extinguisher

How Do Fire Extinguishers Work?  

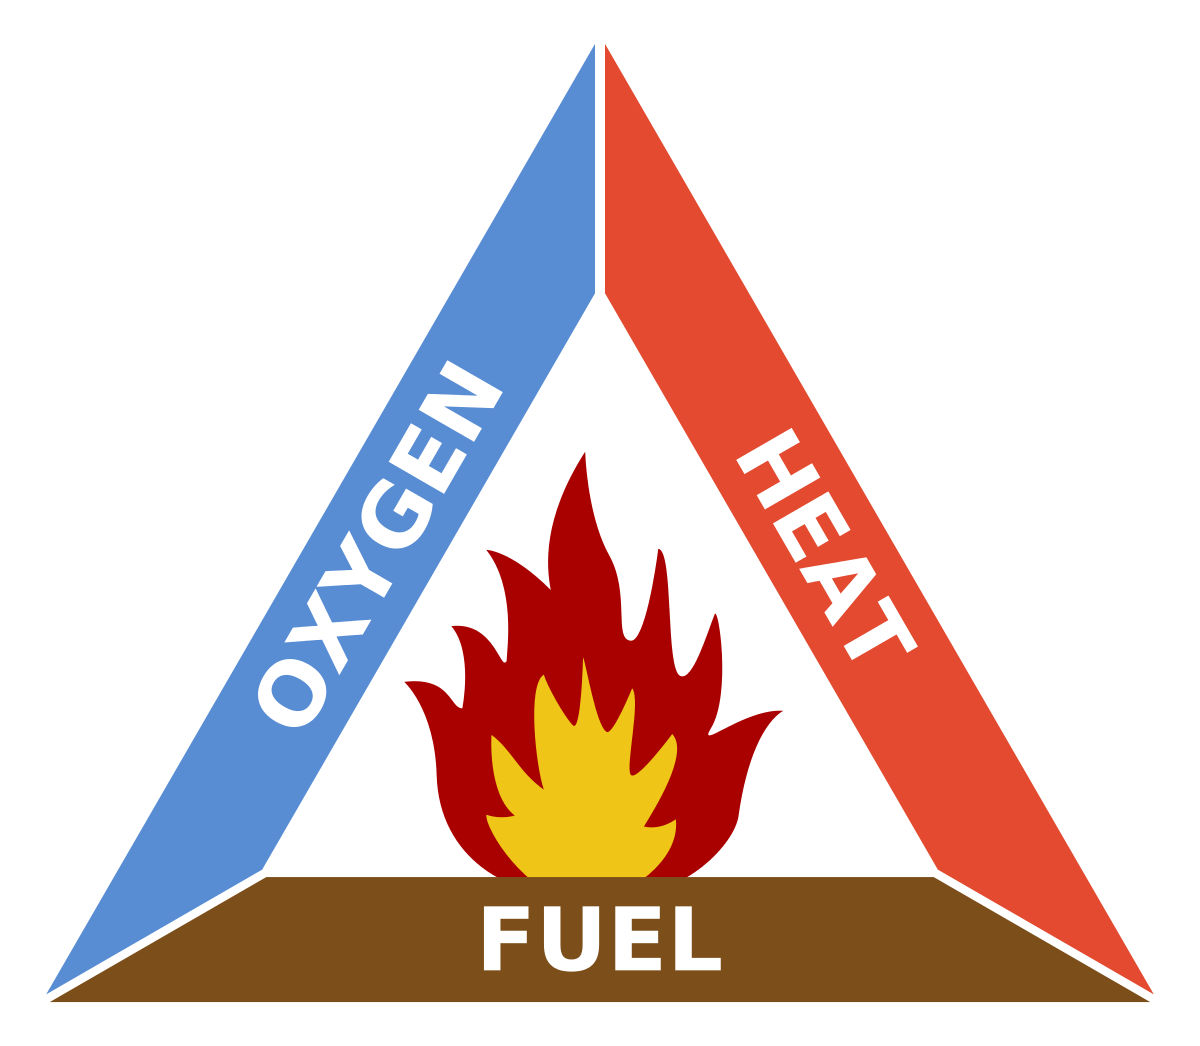
At their most basic, fire extinguishers work by removing one or more elements from the fire triangle. Fire needs three things to keep burning: heat, fuel and oxygen. Take away any one of those and the fire goes out.

Every extinguisher is a pressurised cylinder containing an extinguishing agent. Pull the safety pin, squeeze the handle, and that pressure forces the agent out through a nozzle or horn. Simple enough in principle, but the agent inside determines which fires the extinguisher can tackle safely and which it should never go near.

Different types tackle the fire triangle in different ways. Some cool the fire down, while others smother it or interrupt the chemical reaction keeping it alive. That’s what makes each type distinct and why knowing the difference matters more than most people realise.

Water Mist Fire Extinguishers  

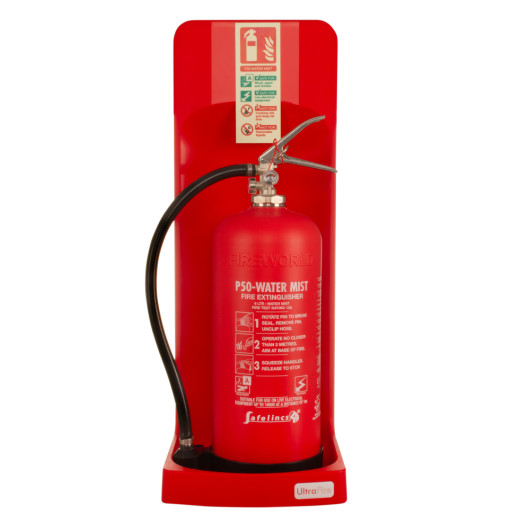
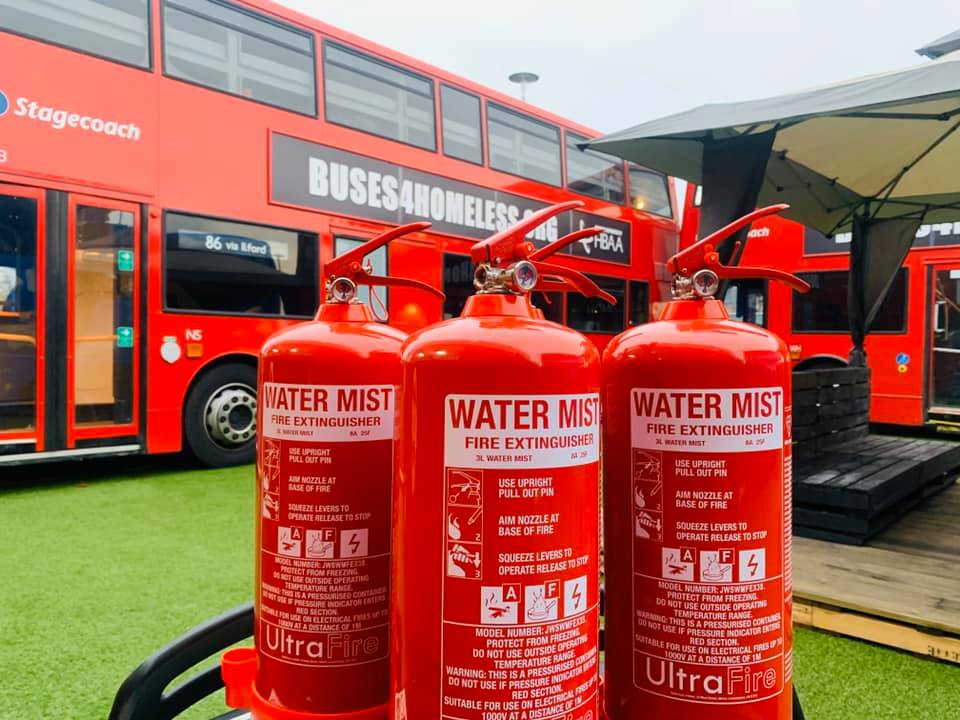
Water mist extinguishers are a modern evolution of the traditional water extinguisher and arguably the most versatile type on this list. Same red body, but the technology inside is a significant step forward. They’ve become increasingly popular in care homes, hospitals, schools and commercial kitchens, and it’s easy to see why.

How Do Water Mist Fire Extinguishers Work?

Rather than a solid jet of water, water mist extinguishers release an ultra-fine mist of microscopic droplets. This increases the surface area in contact with the fire, cooling it faster while simultaneously displacing oxygen around the flame. The droplets are so fine that the mist is safe to use around electrical equipment up to 1000V.

What Can Water Mist Fire Extinguishers Be Used On?

Water mist extinguishers handle Class A fires (solid materials) and Class F fires involving cooking oils and fats. That combination is what sets them apart from standard water extinguishers and makes them such a practical choice in environments where multiple fire risks are present. Their suitability near live electrical equipment up to 1000V makes them incredibly versatile.

Shop Water Mist Fire Extinguishers

Discover our full range of water mist fire extinguishers to find the right one for your home or business.
Image

Foam Fire Extinguishers  

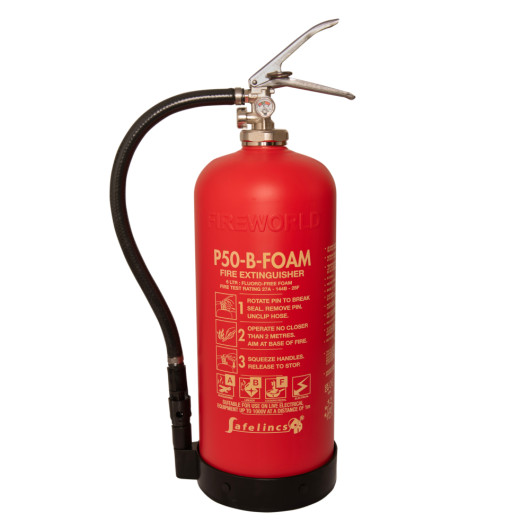
Foam extinguishers are a versatile option, identifiable by their red body and cream-coloured panel. However, water mist extinguishers are generally the preferred recommendation in most environments. They offer comparable versatility without leaving any residue to clean up, and unlike foam, they won’t cause damage if deployed near food or on delicate fabrics.

Foam remains a capable choice for workshops and commercial premises where multiple fire risks are present, but if you’re looking for a single extinguisher that covers everyday risks with minimal collateral impact, water mist is usually the better answer.

What Are Foam Fire Extinguishers Used For?

Foam works by forming a blanket over the burning material, sealing off oxygen and preventing flammable vapours from escaping and re-igniting. There’s a cooling effect too, which makes them effective on two fronts at once. Think of it as smothering and cooling simultaneously, which is a combination that makes them particularly reliable on liquid fires.

What Can Foam Fire Extinguishers Be Used On?

Foam extinguishers are rated for Class A fires (solid materials) and Class B fires covering flammable liquids like petrol and paint. That dual rating is what makes them such a practical choice where both fire risks coexist.

Foam extinguishers are usually suitable for use on live electrical equipment. Look for the dielectric test symbol on the front of the extinguisher to confirm this. Like water extinguishers, they should never be used on Class F fires involving cooking fats.

Shop Foam Fire Extinguishers

Discover our full range of foam fire extinguishers to find the right one for your home or business.
Image

CO2 Fire Extinguishers  

CO2 extinguishers are the clean, no-mess option. They are identifiable by their red body, black panel and distinctive hard horn rather than a standard nozzle. They are the best choice for anywhere with equipment that needs protecting, such as server rooms and offices as they leave no residue or damage.

What Can CO2 Fire Extinguishers Be Used On?

CO2 works by displacing the oxygen around a fire. Carbon dioxide is heavier than air, so it floods the area and suffocates the flames. CO2 extinguishers are rated for Class B fires (flammable liquids) and are the go-to choice for electrical fires, covering server rooms, computer-filled offices and control rooms among others.

They’re not suitable for Class A fires, as without cooling the burning material, solid fuels can re-ignite once the CO2 disperses. Worth keeping in mind if your risk assessment covers both.

A note on safety

CO2 displaces oxygen for humans as well as fires. In small or enclosed spaces, ensure ventilation after use. The horn also gets extremely cold during discharge, so always grip the insulated handle to avoid cold burns.

Shop CO2 Fire Extinguishers

Discover our full range of CO2 fire extinguishers to find the right one for your home or business.
Image

Powder Fire Extinguishers  

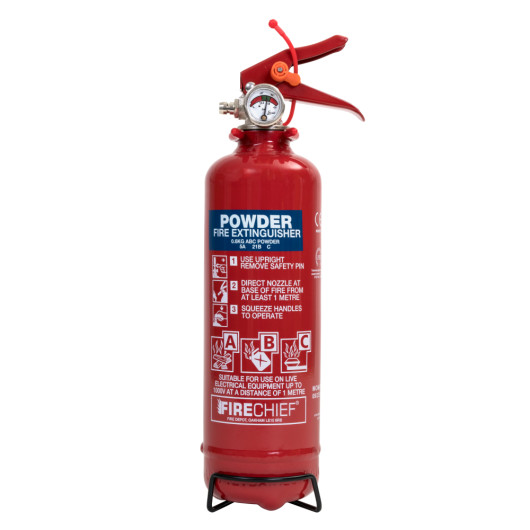
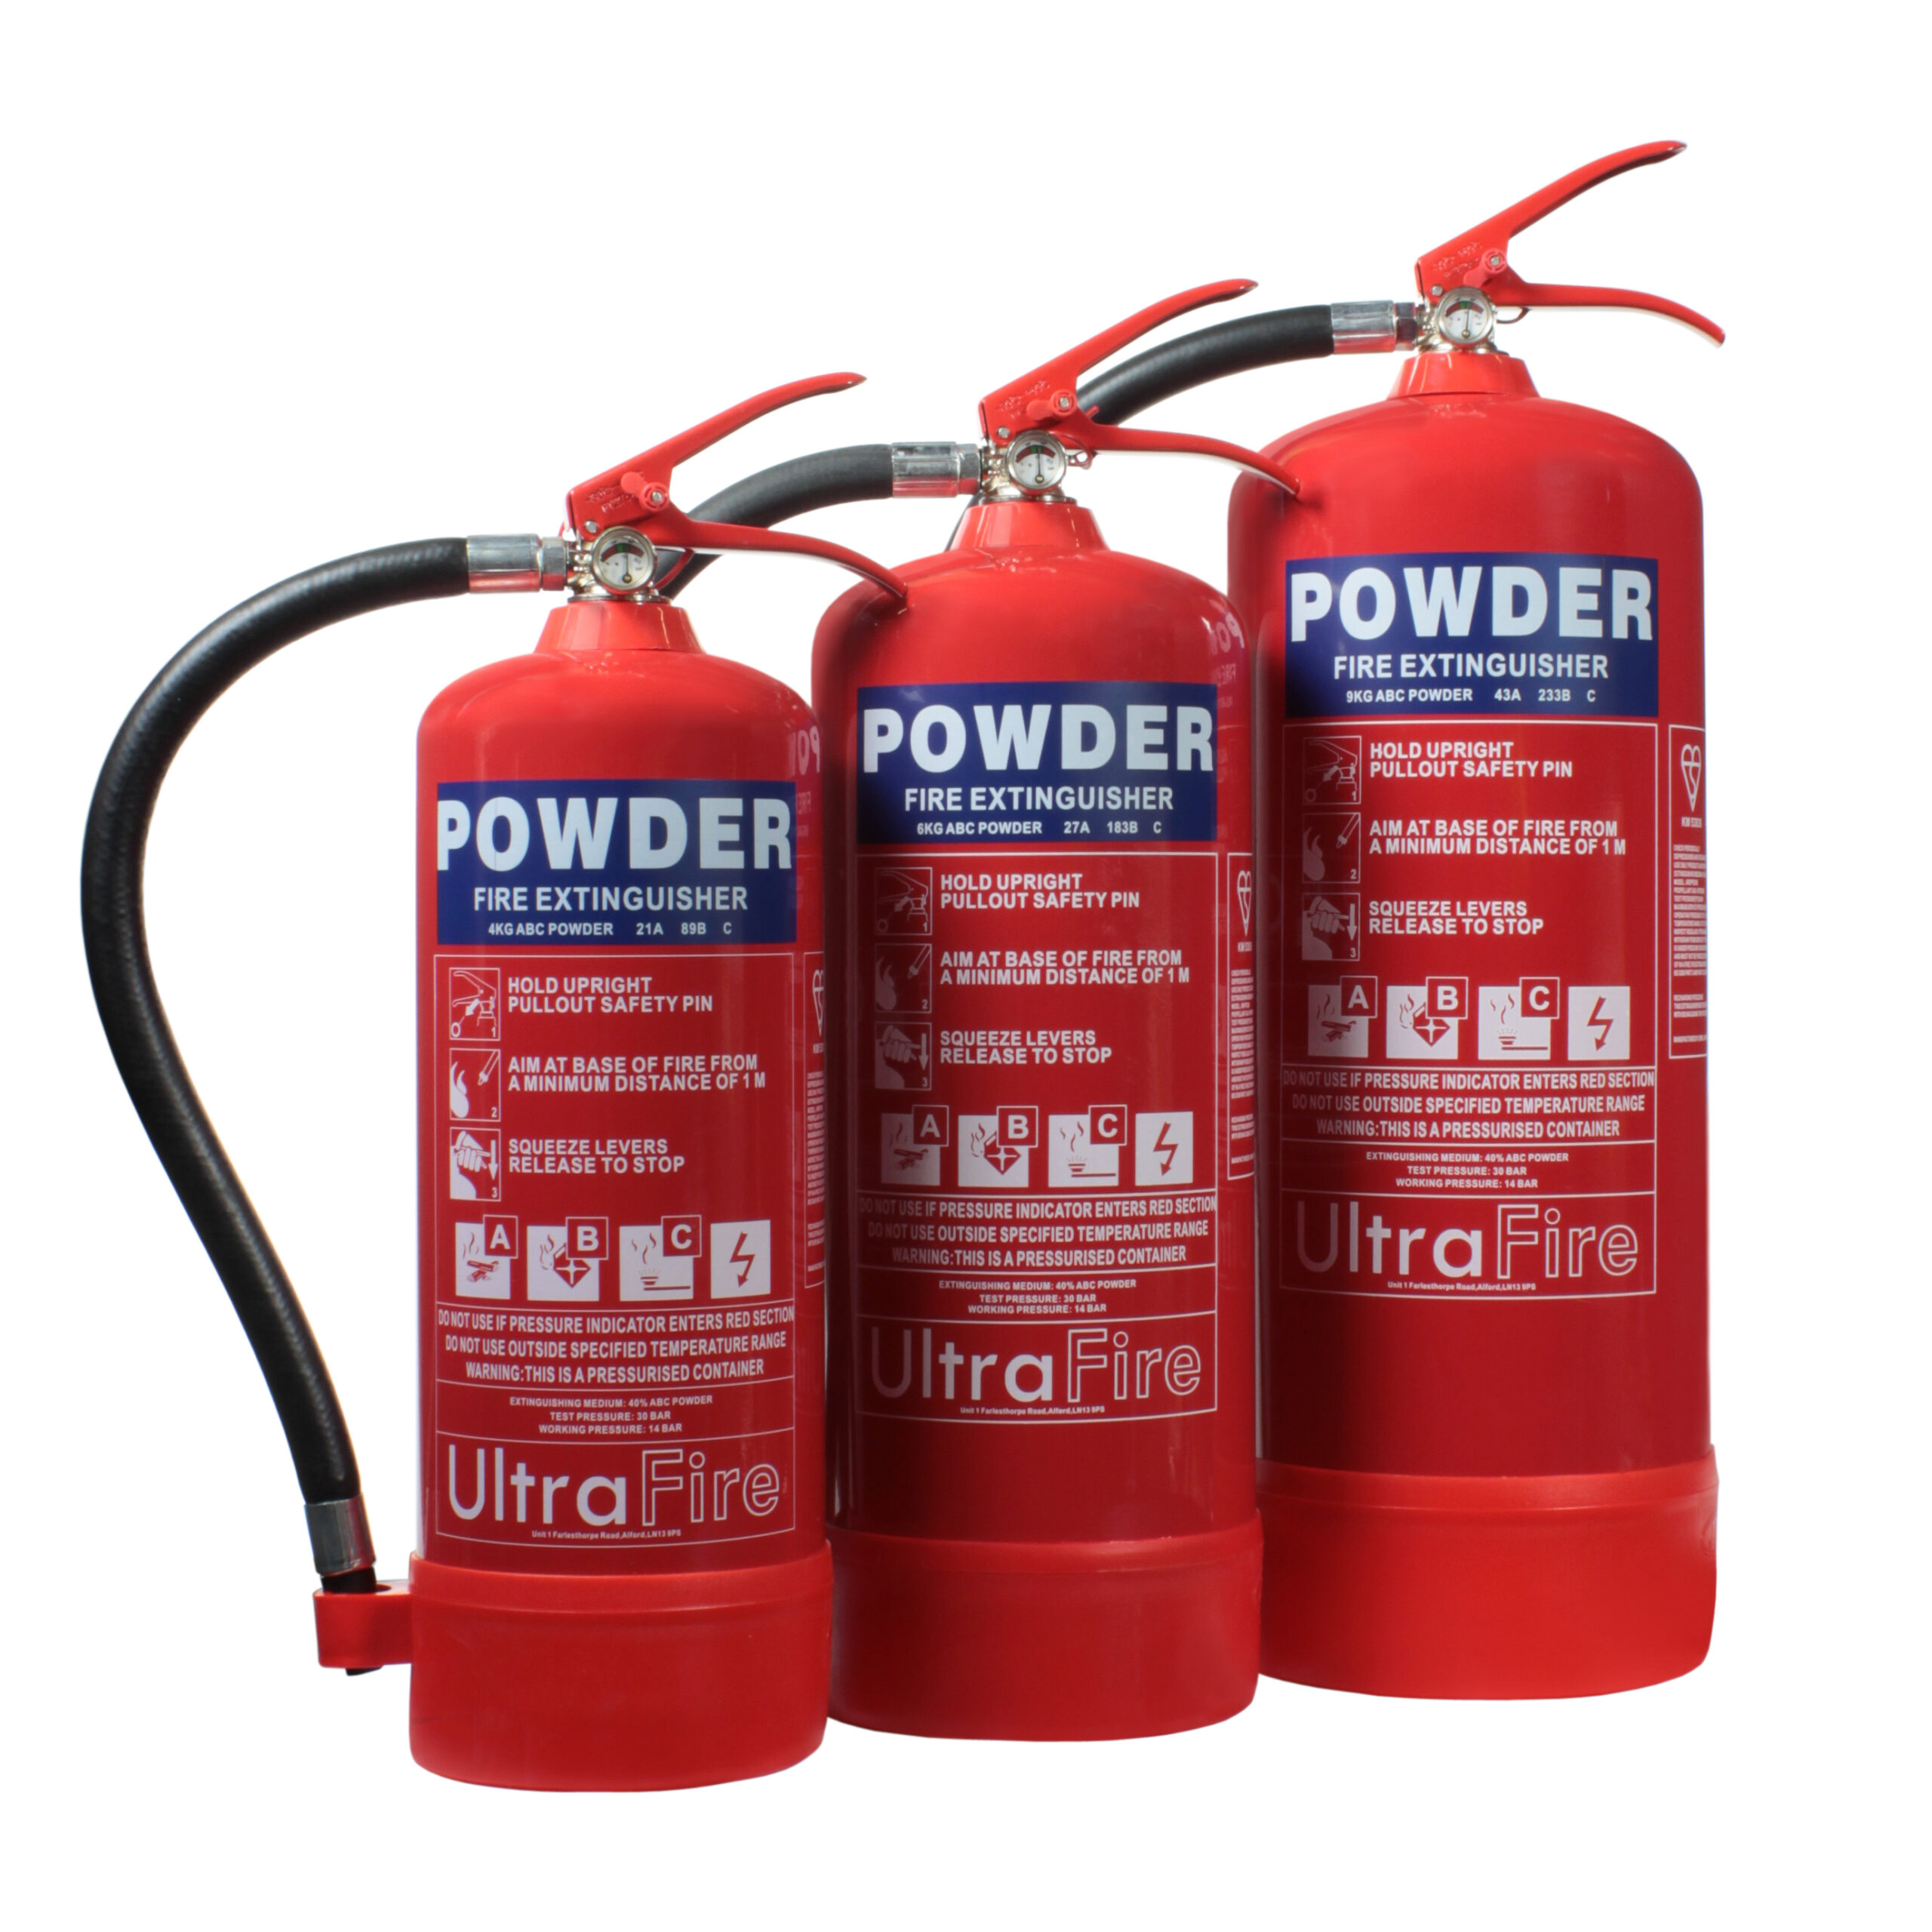
Powder extinguishers (often called ABC or dry powder extinguishers) are the broadest spectrum type available. Common in vehicles and outdoor spaces, you can quickly identify a powder extinguisher via its red body and blue panel.

What Are Powder Fire Extinguishers Used For?

The powder interrupts the chemical chain reaction that sustains a fire, breaking the process at a molecular level. It’s a different mechanism to cooling or smothering and it’s what gives powder its unusually wide coverage.

Dry powder extinguishers handle Class A, Class B and Class C fires. Class C covers flammable gases like LPG and natural gas, making powder one of the few types suitable for gas fires. That’s why you’ll find them in industrial environments and on commercial vehicles.

The catch? Powder is messy. It obscures visibility during use and can cause breathing difficulties in enclosed spaces. Think of it as the sledgehammer of fire extinguishers: devastatingly effective, but not remotely subtle. For most indoor settings it isn’t the first choice despite its range.

Shop Dry Powder Fire Extinguishers

Discover our full range of dry powder fire extinguishers to find the right one for your home or business.
Image

Wet Chemical Fire Extinguishers  

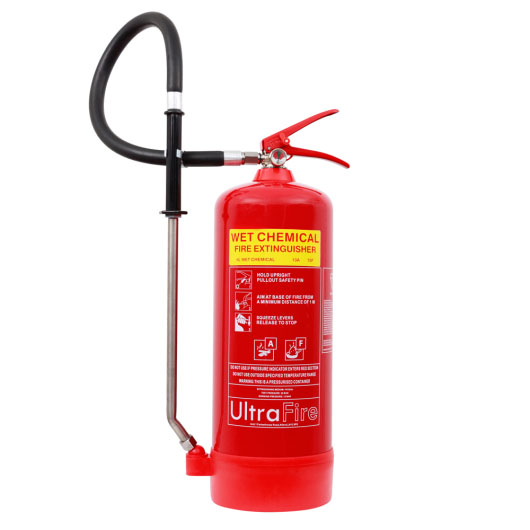
With a red body and yellow panel, wet chemical extinguishers are the specialist option. If you run a commercial kitchen, they’re non-negotiable. They exist specifically to tackle a type of fire that most other extinguishers simply cannot handle safely: burning cooking oil.

What Are Wet Chemical Fire Extinguishers Used For?

Wet chemical extinguishers work in two ways at once. The potassium-based solution reacts with burning oil to create a soapy foam layer, sealing the surface and cutting off oxygen. Simultaneously it cools the oil rapidly, reducing the risk of re-ignition once the fire is out. It’s a precise solution to a genuinely hazardous fire type, such as chip pan fires and deep fat fryers.

What Can Wet Chemical Fire Extinguishers Be Used On?

Wet chemical extinguishers are rated for Class F fires (burning cooking oils and fats) which is their primary purpose. Many models also cover Class A fires, making them a practical dual-purpose choice in kitchen environments where solid material fires are also a risk.

Outside that scope, they’re not the right tool for flammable liquids, though most Class F extinguishers are suitable for use on live electrical equipment, as they are designed for use on electrical cookers. In a kitchen setting that’s rarely a problem, but it’s worth knowing the limits before you need to act on them.

Shop Wet Chemical Fire Extinguishers

Discover our full range of wet chemical fire extinguishers to find the right one for your home or business.
Image

Class L fires: lithium-ion battery extinguishers  

As lithium-ion batteries become increasingly common in everything from electric vehicles to e-bikes, scooters, and portable electronics, a new category of extinguisher has emerged to tackle the specific hazard they present. Class L extinguishers are designed for lithium-ion cell and battery fires, where conventional agents are largely ineffective and can sometimes make the situation worse.

Lithium-ion battery fires burn at extremely high temperatures and are prone to thermal runaway, a self-sustaining reaction that can cause a battery to repeatedly re-ignite even after it appears to have been extinguished. Class L extinguishers use specialist agents formulated to cool the battery cells rapidly and suppress this process.

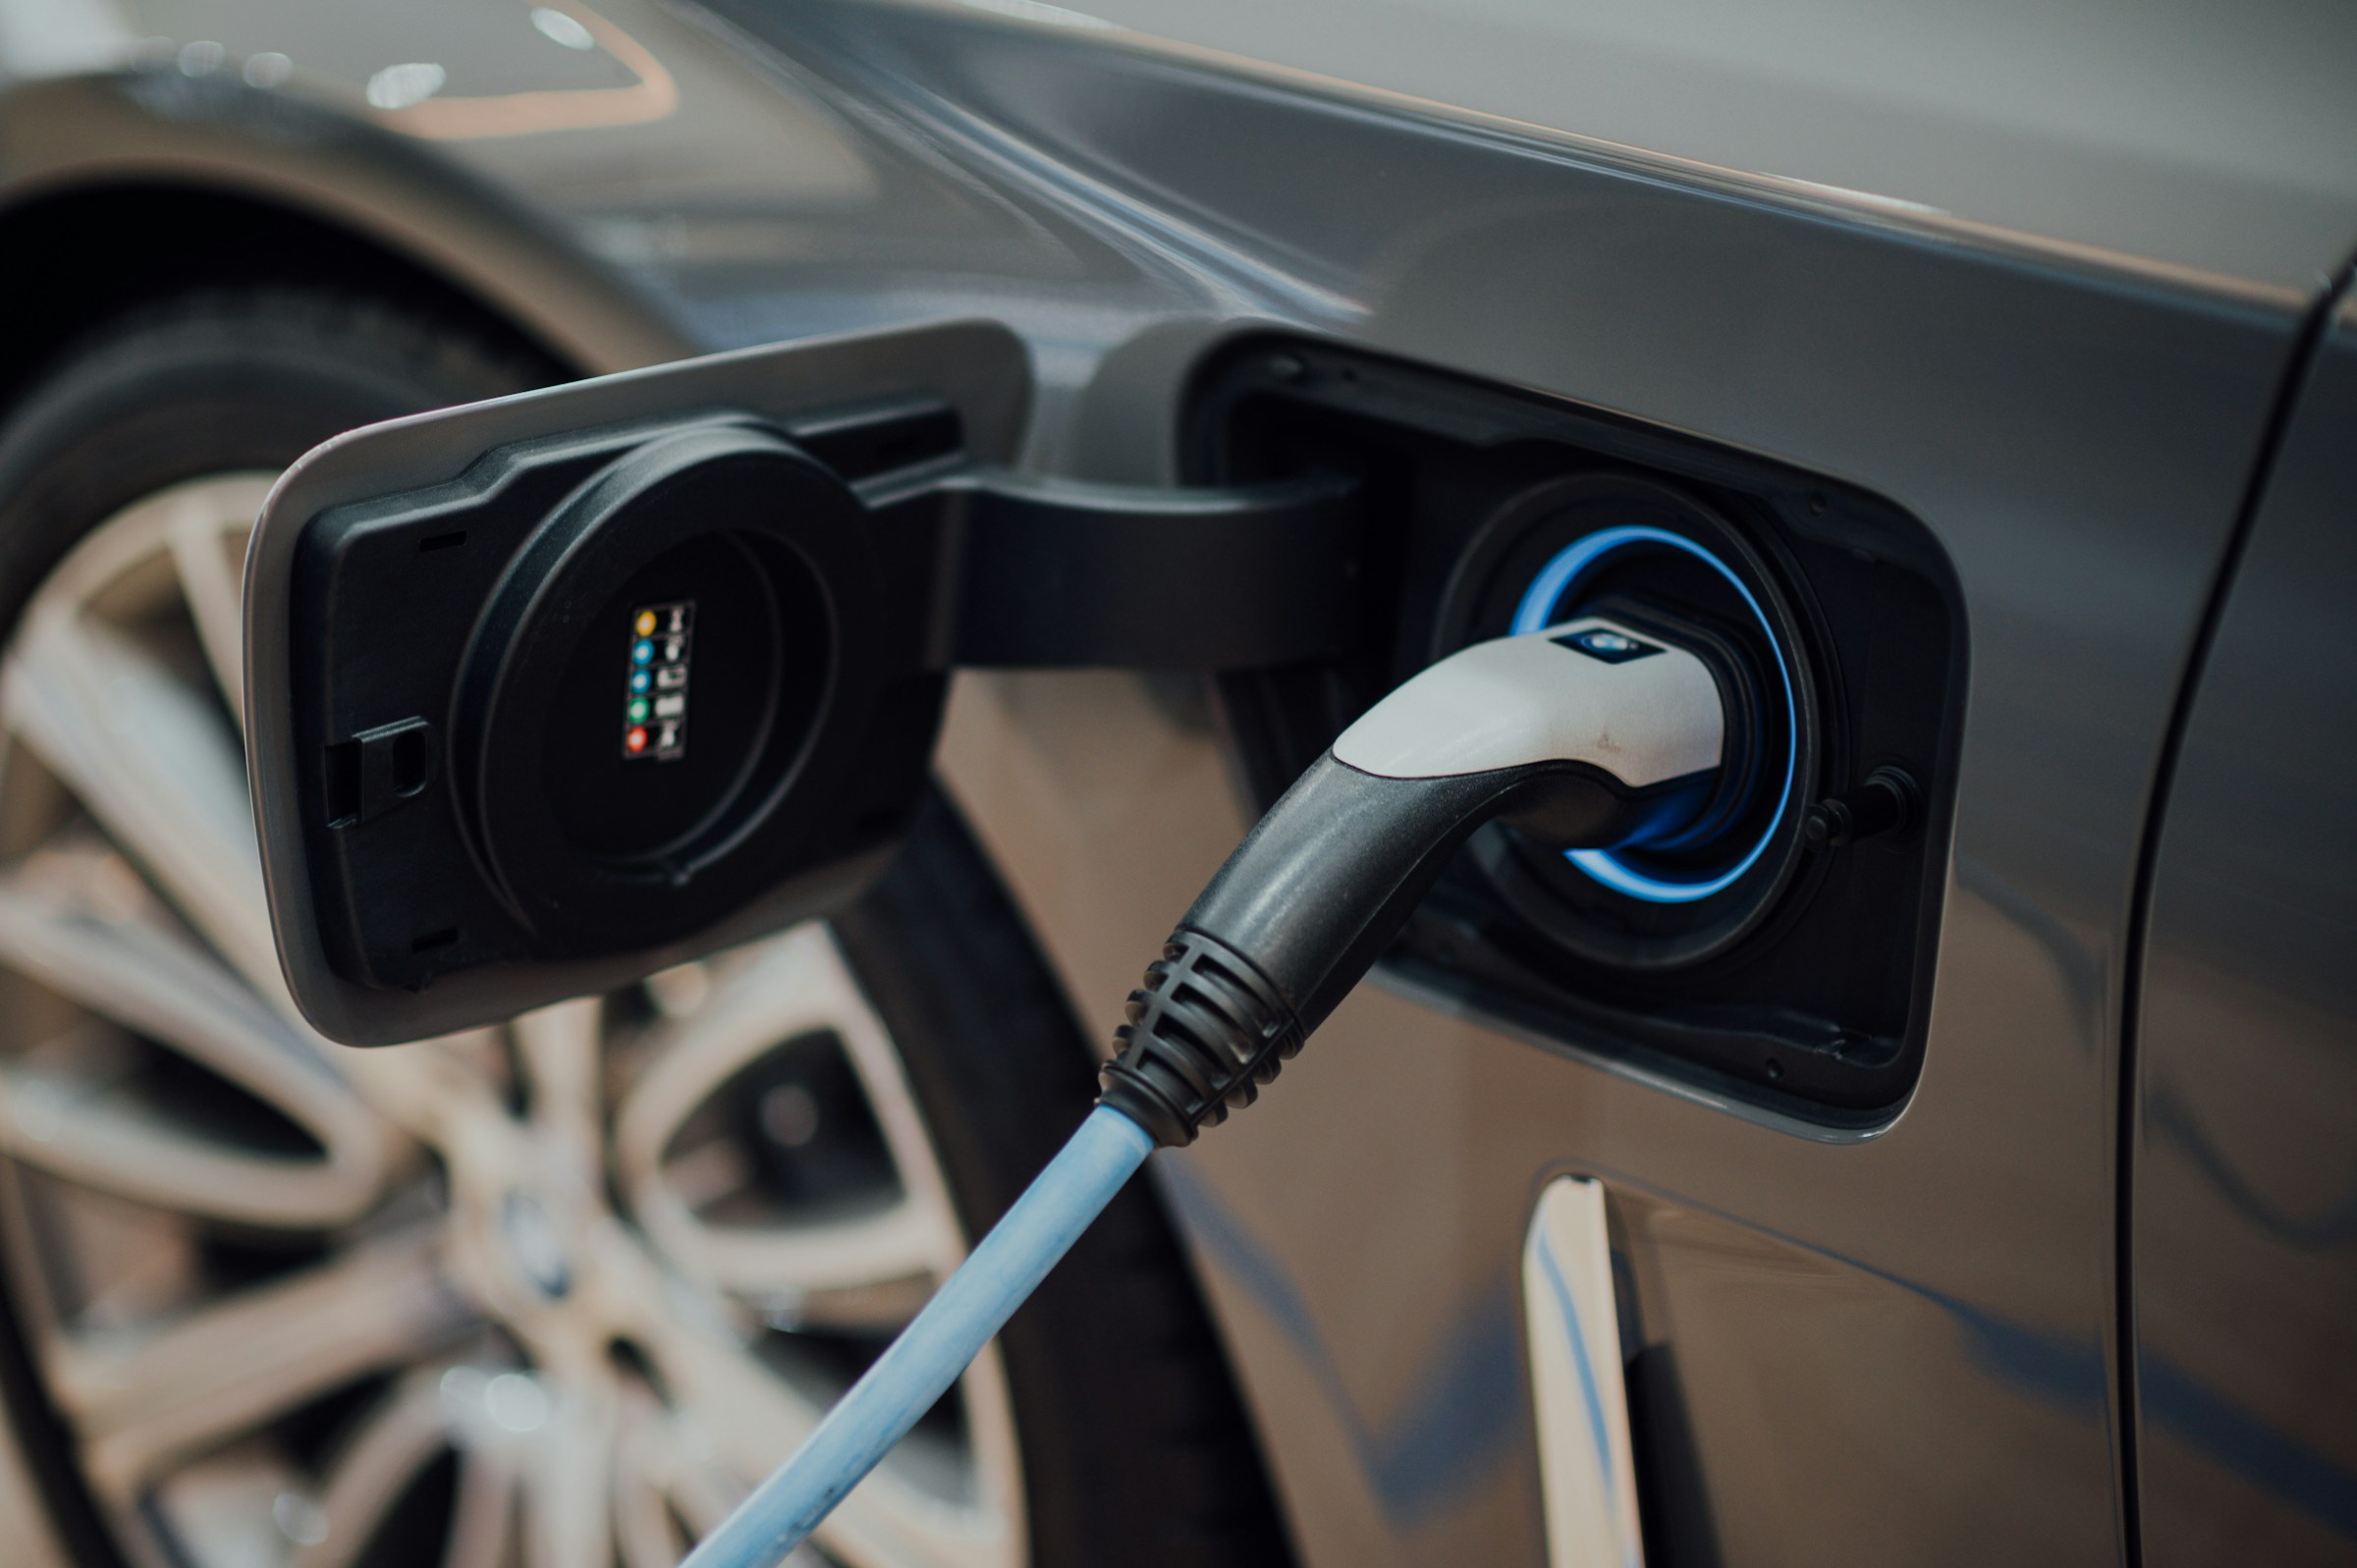
These extinguishers are particularly relevant anywhere lithium-ion batteries are stored, charged, or used in significant quantities, including EV charging points, e-bike storage areas, warehouses handling battery-powered equipment, and premises with large numbers of portable devices.

Shop Lithium-Ion Battery Fire Extinguishers

Discover our full range of lithium-ion fire extinguishers to find the right one for your home or business.
Image
💡

How Many Fire Extinguishers Do I Need?

The honest answer is that it depends on your premises, the fire risks present and the layout of the building.

Under the Regulatory Reform (Fire Safety) Order 2005, businesses in England and Wales must carry out a fire risk assessment and provide appropriate firefighting equipment. British Standard BS 5306-8 gives more specific direction: as a general rule, at least one 13A-rated water or foam extinguisher per 200 square metres of floor space, with a minimum of two extinguishers per floor.

That’s a starting point, not a formula. A commercial kitchen with deep fat fryers or significant oil-based cooking needs wet chemical, while a server room needs CO2. The types and quantities should reflect the actual risks in your specific environment, which is exactly why a proper fire risk assessment matters.

Unsure where to start? Our team at Safelincs can help you work through it with a fire extinguisher site survey, or you can use our fire risk assessment tools for a clearer picture.  

Fire Extinguishers Explained  

Not sure which type you need at a glance? This table covers all six types, the fire classes they handle and where they’re best placed. The amber entries are the ones worth paying attention to; they flag the conditions and limitations that catch people out.  

Type Panel colour Class ASolids Class BLiquids Class CGases Class FCooking oils Electrical Best for
Water Red Yes No No No No Offices, warehouse, retail
Water mist Red Yes No No Yes Up to 1000V Care homes, hospitals, kitchens
Foam Cream Yes Yes No No If tested Garages, workshops, mixed risks
CO2 Black No Yes No No Yes Server rooms, offices, electrical
Dry powder Blue Yes Yes Yes No Limited Industrial, vehicles, outdoor
Wet chemical Yellow Many models No No Yes No Commercial kitchens, deep fat fryers
Type
Water
Panel colour
Red
Class ASolids
Yes
Class BLiquids
No
Class CGases
No
Class FCooking oils
No
Electrical
No
Best for
Offices, warehouse, retail
Type
Water mist
Panel colour
Red
Class ASolids
Yes
Class BLiquids
No
Class CGases
No
Class FCooking oils
Yes
Electrical
Up to 1000V
Best for
Care homes, hospitals, kitchens
Type
Foam
Panel colour
Cream
Class ASolids
Yes
Class BLiquids
Yes
Class CGases
No
Class FCooking oils
No
Electrical
If tested
Best for
Garages, workshops, mixed risks
Type
CO2
Panel colour
Black
Class ASolids
No
Class BLiquids
Yes
Class CGases
No
Class FCooking oils
No
Electrical
Yes
Best for
Server rooms, offices, electrical
Type
Dry powder
Panel colour
Blue
Class ASolids
Yes
Class BLiquids
Yes
Class CGases
Yes
Class FCooking oils
No
Electrical
Limited
Best for
Industrial, vehicles, outdoor
Type
Wet chemical
Panel colour
Yellow
Class ASolids
Many models
Class BLiquids
No
Class CGases
No
Class FCooking oils
Yes
Electrical
No
Best for
Commercial kitchens, deep fat fryers

Choosing the Right Extinguisher

The right extinguisher comes down to the fire risks in your specific environment. For most offices and homes, a water mist or foam extinguisher covers the majority of likely scenarios. Add a CO2 where electrical equipment is present. If you have a kitchen with deep fat fryers, a wet chemical extinguisher is essential.

Safelincs stocks a full range of fire extinguishers from leading manufacturers, including service-free models that cut ongoing maintenance costs without compromising on safety. All products meet UK standards, so you can buy with confidence knowing they’ll perform when it matters most.

Still wondering how many different types of fire extinguishers there are and which one is right for your building? Our UK-based customer service team are on hand to help, whether you’re kitting out a single office or managing fire safety across a large estate. Get in touch and we’ll be happy to answer any questions you may have.  

Mel Saunders

Head of Marketing

With over 20 years of experience in content writing, design and marketing, Mel now heads up the Content & Marketing Team at Safelincs. Having been in the fire safety industry for over 5 years, Mel has now developed a deep understanding of some of the critical issues facing the industry. Alongside her team, she aims to support the public with resources and information to help them improve fire safety at home, in the workplace or in 3rd sector organisations.

Latest Posts by Mel Saunders

What Is A Class D Fire?14th May 2026
What Is A Class F Fire?13th May 2026
Ionisation Smoke Alarms Buyers Guide12th May 2026

What do we do to maintain our emergency lighting

What do we do to maintain our emergency lighting? It’s a question that doesn’t get asked nearly enough. Emergency lighting maintenance is one of those things nobody prioritises until they really, really need it. The power cuts out and suddenly those glowing green exit signs are the most important things in the building. Not to mention the fact that the law requires you to maintain emergency lighting in your building, and the stakes are higher than most people realise.

Whether you are responsible for a busy office, a bustling shop, a rented property or a sprawling commercial site, this guide covers everything you need to know when it comes to properly maintaining your emergency lighting.

  💡In This Guide

  • What Is Emergency Lighting?
  • What Is the Purpose of Emergency Lighting?
  • Where Is Emergency Lighting Required?
  • How Often Should Emergency Lighting Be Tested?
  • How to Test Emergency Lighting
  • Who Can Test Emergency Lighting?
  • What Do We Do to Maintain Our Emergency Lighting?

What Is Emergency Lighting?  

Emergency lighting is a battery-backed lighting system that activates automatically when the mains power supply fails. Unlike standard light fittings, these do not rely on the grid. They have their own internal power source, so when the likes of a powercut happen, people can still see where they are going.

There are two main types: escape route lighting illuminates the path people need to follow to get out safely, while standby lighting allows normal activities to continue during a power failure. This is most common in places such as hospitals or control rooms where work simply cannot stop. Most systems are either Maintained (on all the time) or non-maintained (only activating when the mains fails). The type you need depends on how your building is used.

What Are Illuminated Exit Signs?

Illuminated exit signs are technically a form of emergency lighting, but they cause more confusion than you might expect, largely because people are not always sure whether they should be on all the time or only during an emergency.

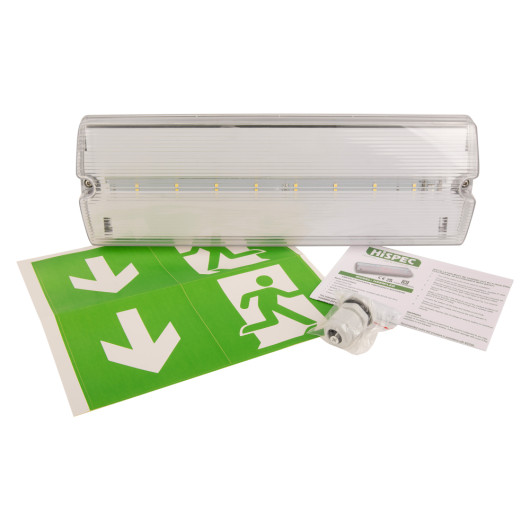
Those green running-man signs above fire doors need to be either maintained (always illuminated) or non-maintained (only lit during an emergency). In most public buildings, maintained signs are the standard. The logic is simple: you want people to know exactly where the exits are before a fire breaks out, not just when they are already scrambling to find them.

What Is the Purpose of Emergency Lighting?

The purpose of emergency lighting is to keep people safe when an emergency plunges a building into darkness. This could be anything from a powercut to a fire. 

Without it, evacuation becomes dangerous. People trip, panic, lose their bearings and struggle to find exits they would otherwise walk past every day. There is also a legal dimension. The Regulatory Reform (Fire Safety) Order 2005 requires it for most non-domestic premises in England and Wales. Equivalent legislation covers Scotland and Northern Ireland. Your fire risk assessment should identify whether it is needed and where; if it does, you are obligated to install and maintain the system correctly.  

Image

💡Where Is Emergency Lighting Required?

Emergency lighting is required anywhere that a loss of mains lighting would put people at risk. In practice, that means most areas of most commercial buildings. The fittings are typically needed in:

  • Escape routes, including corridors and stairwells
  • Open plan areas where people work or gather
  • Changing rooms and toilet facilities above a certain size
  • Locations housing fire fighting equipment
  • Areas around fire alarm call points
  • Any spot containing a hazard that someone might walk into in the dark

That last one is worth thinking about carefully. A poorly lit plant room or a stairwell with an awkward turn can be seriously dangerous without adequate lighting during an emergency.

Does My Building Need Emergency Lighting?  

Most commercial and public buildings will need some form of it. This includes:

  • Offices and retail premises
  • Schools, hospitals and care homes
  • Hotels and leisure facilities
  • Places of worship
  • HMOs and buildings with shared communal areas

If you are unsure, a professional fire risk assessment for your premises is the right way to establish your specific requirements. Standard single-occupancy homes are generally exempt, but properties with shared areas, such as blocks of flats, will almost certainly need it in common parts like corridors and stairwells.  

How Often Should Emergency Lighting Be Tested?  

Emergency lighting should be tested more often than most people realise. Emergency lighting is not a fit-and-forget installation; it needs regular, documented testing to remain compliant and, more importantly, to actually work when it is needed.

BS 5266-1:2025 (the British Standard that governs emergency lighting, updated in October 2025 to replace the previous 2016 edition) sets out a clear schedule. Here is what it looks like:

Test type Frequency Duration Who can do it
Short functional test Monthly ~1 minute Competent in-house person
Full rated discharge test Annually 3 hours Competent person or qualified contractor
Test type
Short functional test
Frequency
Monthly
Duration
~1 minute
Who can do it
Competent in-house person
Test type
Full rated discharge test
Frequency
Annually
Duration
3 hours
Who can do it
Competent person or qualified contractor

The monthly test is a quick check to confirm the system activates. The annual test is the proper stress test; it runs the batteries down to their full rated duration to confirm they can sustain the system when it counts.

Some modern systems come with self-testing functionality, where each luminaire carries out its own checks automatically and logs the results. For larger sites, this can be a genuine time-saver and is well worth considering.  

How to Test Emergency Lighting

Thankfully, testing isn’t complicated. It does, however, need to be done properly and recorded every single time.  

Monthly Emergency Lighting Test (Short Functional Test)

The monthly test is about confirming basic functionality. You are simply checking that the lights come on when the mains power is interrupted and that exit signs illuminate as they should.

To carry it out, the mains supply to the emergency lighting circuit is interrupted; either via a key switch, a dedicated test switch or by isolating the circuit at the distribution board. The fittings should activate immediately. Once you have confirmed they are working, restore the mains supply and allow the batteries to recharge. Keep the test short to avoid draining the batteries unnecessarily.

Log the date, the tester’s name and the outcome straight away. Do not leave it until the end of the week.

Annual Emergency Lighting Test (Full Duration Test)

Annual emergency lighting takes a bit more planning. The mains supply is cut for the full rated duration of the system (three hours for most installations) and the lights must remain functional throughout. At the end of the test, every luminaire and sign is checked to confirm it is still illuminated.

As this discharges the batteries significantly, it needs to happen at a time when the building will not need the system to work in an emergency for at least 24 hours afterwards. For sites that are occupied around the clock, that takes some coordination.

Any faults found during the annual test must be repaired and retested before the system is signed off. A failed luminaire or a battery that gives up the ghost partway through needs to be fixed before you can consider the test complete.

Who Can Test Emergency Lighting?  

The monthly functional test can be carried out by a competent, trained member of staff. This basically means someone who understands the system, knows how to use the test switches and isolation procedures and can record the results accurately. A specialist contractor isn’t needed in this scenario, so long as your staff member actually knows what they are doing.

The annual full duration test is a different matter, however. Technically, a competent internal team member can still carry it out. In practice, many organisations bring in a qualified electrical contractor or specialist fire safety engineer for this one, and there are good reasons for that. The annual test involves extended electrical isolation, a thorough inspection of every fitting and a proper assessment of battery condition. Missing a fault at this stage is not just a paperwork problem.

Does Emergency Lighting Testing Need to Be Certified?

For many premises, yes. Buildings subject to third-party audits, specific insurance requirements or licensing conditions will often need a written certificate confirming the annual test was carried out to BS 5266-1. A qualified contractor can provide this, which gives building owners and managers a useful layer of documented assurance.

If you manage a large or complex site, a maintenance contract covering both monthly and annual testing is worth serious consideration. It removes the risk of something slipping through the cracks, which (speaking from experience dealing with a lot of building managers) happens more often than anyone likes to admit.

Image

What Do We Do to Maintain Our Emergency Lighting?  

Good emergency lighting maintenance comes down to a consistent process, carried out by people who know what they are looking for every single time.

Here is what a solid regime looks like in practice:

  • Monthly: A short functional test confirms all luminaires and exit signs activate correctly. Results go into the log book the same day.
  • Annually: A full rated discharge test is completed, batteries are assessed, any faults are repaired and the system is certified as compliant with BS 5266-1.
  • Ongoing: Any faults spotted during routine checks are dealt with promptly. A dim luminaire, a cracked fitting or a failing exit sign LED should never be left for the next scheduled test. Emergency lighting faults are not the kind of thing to add to a to-do list and forget about.

It’s also worth carrying out a visual inspection as part of your regular fire safety walkround. Fittings should be clean, undamaged, unobstructed and positioned correctly. If someone has moved a cabinet in front of an exit sign, or a new partition has been put up that leaves a dark patch in an escape route, those problems need fixing outside of the formal test schedule.

Keeping Records

This deserves its own mention, because it is the part that most often gets overlooked. A testing log is not a bureaucratic formality, but your evidence of compliance. Without it you have very little to show anyone who asks.

Your log should record every test carried out: the date and time, the name of the person responsible, the outcome and any remedial actions taken. Safelincs offers free fire safety log books to help with exactly this, ready for download instantly.

A system that has not been tested, has failing batteries or leaves dark spots in an escape route is a real risk to real people. The good news is that maintaining it properly is not complicated. A clear testing schedule, a reliable log book and competent people carrying out the checks will cover the vast majority of what you need.

If you need support, whether that is sourcing the right emergency lighting fittings and luminaires, getting clarity on your legal obligations or arranging a fire risk assessment, the Safelincs team is here and genuinely happy to help. Feel free to get in touch and we’ll answer any query you may have.  

Mel Saunders

Head of Marketing

With over 20 years of experience in content writing, design and marketing, Mel now heads up the Content & Marketing Team at Safelincs. Having been in the fire safety industry for over 5 years, Mel has now developed a deep understanding of some of the critical issues facing the industry. Alongside her team, she aims to support the public with resources and information to help them improve fire safety at home, in the workplace or in 3rd sector organisations.

Latest Posts by Mel Saunders

What Is A Class D Fire?14th May 2026
What Is A Class F Fire?13th May 2026
Ionisation Smoke Alarms Buyers Guide12th May 2026

Can You Extinguish a Lithium-ion Battery Fire?

You may not realise it, but lithium-ion (Li-ion) batteries are everywhere. Your phone, your laptop, the power drill in the garage, your kid’s e-scooter – they all run on the same rechargeable technology. Most of the time, they’re perfectly safe. When something goes wrong, however, the fire risk is a very different beast to anything we’ve traditionally dealt with. So, can you extinguish a lithium-ion battery fire? And if so, how? Let’s take a look at what fire safety technology exists to help.

💡
Contents

  • What Class of Fire Is a Lithium-Ion Battery?
  • How Hot Is a Lithium-Ion Battery Fire?
  • What to Do If a Lithium-Ion Battery Catches Fire
  • How to Put Out a Lithium-Ion Battery Fire

What Class of Fire Is a Lithium-Ion Battery?

This is a question that’s had the fire safety industry scratching its head for years, simply because it’s not always been clear. Traditionally, fires are split into classes based on the fuel type: Class A for solids, Class B for flammable liquids, Class D for metals, and so on. Lithium-ion battery fires never sat neatly in any of these boxes.

That’s now changed. In February 2026, the revised standard BS ISO 3941:2026 introduced a brand new category named Class L specifically for fires involving lithium-ion cells and batteries. It’s a landmark update that formally acknowledges what fire safety professionals have long known: these fires behave in a completely different way to anything else.  
Fire Class Type of Fire
A Solid materials (wood, paper, textiles)
B Flammable liquids
C Flammable gases
D Combustible metals
F Cooking oils and fats
L Lithium-ion cells and batteries (new, 2026)
Fire Class
A
Type of Fire
Solid materials (wood, paper, textiles)
Fire Class
B
Type of Fire
Flammable liquids
Fire Class
C
Type of Fire
Flammable gases
Fire Class
D
Type of Fire
Combustible metals
Fire Class
F
Type of Fire
Cooking oils and fats
Fire Class
L
Type of Fire
Lithium-ion cells and batteries (new, 2026)

Unlike conventional fires, a Class L fire is driven by electrochemical reactions happening inside the battery, not just surface combustion. The battery essentially becomes its own fuel source, which is what makes it so tricky to deal with. While Class L does not currently create new UK legal duties on its own, it does mean your fire risk assessment should now explicitly consider the presence of lithium-ion batteries. If it doesn’t, it’s likely out of date.

How Hot Is a Lithium-Ion Battery Fire?

Short answer: extremely hot. We’re talking melt-your-tools hot.

A lithium-ion battery fire is caused by a process called thermal runaway. This is, in short, a chain reaction where heat triggers more heat, gases are released, and the fire becomes self-sustaining. Once it starts, it accelerates fast. Battery temperatures during thermal runaway typically range between 200°C and 1,000°C, and in large battery packs or electric vehicles, temperatures can climb even higher.

To put that into context, a petrol-powered vehicle fire burns at around 815°C. An EV fire? Closer to 2,760°C at its peak.

The reason these fires are so ferocious is that decomposing battery cathodes release oxygen as they break down, meaning the fire can sustain itself even when you cut off the external oxygen supply. Smothering it simply doesn’t work in the same way it would with a conventional fire. There’s also the small matter of the toxic gases (including carbon monoxide and hydrogen) that are produced during thermal runaway and present a serious risk to anyone nearby.

Image
⚠️

What to Do If a Lithium-Ion Battery Catches Fire

First things first: if it’s a large fire, or you have any doubt whatsoever, evacuate the area and call 999 immediately. Li-ion fires spread fast and the fumes are toxic, so put your safety first.

That said, if a fire is caught very early or you suspect your lithium-ion battery device is about to go into thermal runaway, you may be able to act quickly and safely. Here’s a general guide:

  • Stop using the device immediately if you notice swelling, overheating, unusual smells, or discolouration
  • Move the device away from flammable materials if it’s safe to do so
  • Do not use a standard water or CO₂ extinguisher as these are likely to be ineffective and could make things worse
  • Use a purpose-built lithium-ion extinguisher if you have one to hand and the fire is very small
  • Call 999 if there’s any doubt and make sure everyone is out of the area
For electric vehicles, the guidance is even clearer: do not attempt to fight the fire yourself. The volume of energy involved makes it beyond the scope of personal firefighting equipment. The London Fire Brigade has useful guidance on safe charging and storage habits worth reading if you have an EV or e-bike at home.  

Image

Lithco 6lr Lithium-Ion Batery Fire Extinguisher

Designed specifically for use on rechargeable lithium-ion battery fires, the LB6 fire extinguisher satisfies modern fire risks in a cost-effective, multi-purpose solution.

  • Designed for UPS systems, laptops, power tools, and bulk device chargers
  • Heat dispersing, low-viscosity agent to penetrate battery casings
  • Rigid applicator lance for enhanced control and user safety
  • Third-party tested up to 360Wh battery capacity

£179.00 ex VAT

£214.80 inc VAT

How to Put Out a Lithium-Ion Battery Fire  

Given that Class L fires are self-oxygenating and can reignite even after appearing extinguished, the goal shifts from “put it out” to “cool it down and contain it.” There are now products specifically designed for exactly that.

Lithium-Ion Fire Extinguishers

There are two types of extinguisher designed specifically for li-ion battery fires.

The Lithco LB6 Fire Extinguisher is a water-based extinguisher containing a special additive called P Foam. Unlike standard water extinguishers, the agent in the LB6 is designed to penetrate through the outer casing of an electrical device and reach the battery itself. It’s been rigorously third-party tested up to 360Wh battery capacity and is proven effective on li-ion fires in handheld devices, laptops and power tools. It’s also safe to use on live electrical equipment up to 1,000V, and handles Class A fires too, making it a versatile unit to have around.

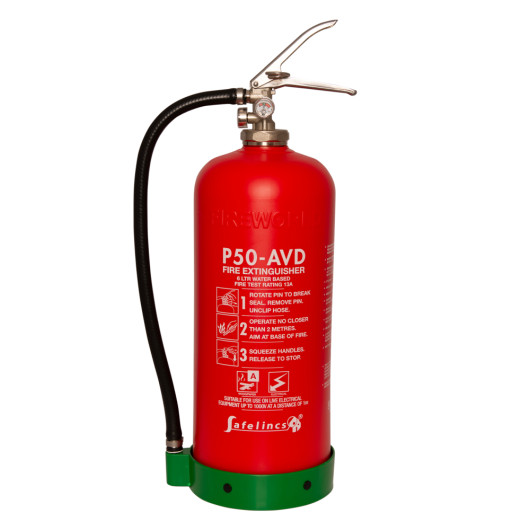
The second type uses an Aqueous Vermiculite Dispersion (AVD) agent. Rather than simply suppressing flames, AVD works by surrounding the burning battery cells and forming a crust around the device, cutting off the fire and acting as a physical barrier that stops it spreading beyond the battery or device itself.

AVD extinguishers are increasingly the recommended choice for lithium-ion fire risks. Compact aerosol versions are well suited to home and workshop use, while larger AVD extinguishers can replace an entire commercial fire point, handling the same risks covered by water and CO2 units as well as Class L lithium-ion fires.

Worth noting: neither type of li-ion extinguisher is suitable for electric car fires. The sheer quantity of extinguishing agent needed makes that a job for the fire service.

Electric Car Fire Blankets

For electric vehicles, the best option available is the Lithco Electric Vehicle Fire Blanket with Telescopic Poles. Rather than trying to extinguish an EV fire outright (which frankly isn’t realistic), the blanket is designed to contain it. It wraps around the vehicle to stop flames and molten debris spreading to nearby cars or structures, while simultaneously cutting off the oxygen supply to slow the fire’s progress.

These blankets are designed for use at car parks, charging stations, car ferries and by fire service personnel. They’re not an extinguishing tool, but a containment one, and that distinction matters enormously when dealing with a fire of this intensity. They should be used by trained personnel only.

Lithium-Ion Battery Storage Safes

Prevention, as ever, beats cure. The Lithium-Ion Battery Fire Protection Box is suitable for quarantining items, and is particularly useful for protection when transporting or storing goods. For larger items, we’d recommend the Premium Plus Storage and Charging Cabinet, which is both fire and explosion proof, ideal for protecting business assets.

If you’re regularly charging e-bikes, power tool batteries, or multiple devices in one location, dedicated battery storage is well worth considering.

Image

If your assessment doesn’t currently account for Class L hazards, now is a good time to revisit it. If you’re not sure what equipment you need, our team at Safelincs is on hand to help, just get in touch via live chat or give us a call.

Mel Saunders

Head of Marketing

With over 20 years of experience in content writing, design and marketing, Mel now heads up the Content & Marketing Team at Safelincs. Having been in the fire safety industry for over 5 years, Mel has now developed a deep understanding of some of the critical issues facing the industry. Alongside her team, she aims to support the public with resources and information to help them improve fire safety at home, in the workplace or in 3rd sector organisations.

Latest Posts by Mel Saunders

What Is A Class D Fire?14th May 2026
What Is A Class F Fire?13th May 2026
Ionisation Smoke Alarms Buyers Guide12th May 2026

How Do Water Fire Extinguishers Work?

Disclaimer: This guide provides general information about water fire extinguishers for educational purposes. Always consult a qualified fire safety professional for advice specific to your premises and ensure you receive proper training before operating any fire extinguisher.

Water fire extinguishers are designed to combat Class A fires by cooling burning materials below their ignition temperature. When you discharge a water fire extinguisher, it releases a stream or spray of water that absorbs heat from the flames and burning surfaces, removing the heat element from the fire triangle. This cooling action rapidly lowers the temperature of materials like wood, paper and textiles, extinguishing the fire and preventing reignition.

Estimated reading time: 7 minutes

Key Takeaways

  • Water fire extinguishers work by removing heat from fires through absorption and cooling.
  • They operate using a stored-pressure mechanism with compressed air or nitrogen as the propellant.
  • Water extinguishers are effective only on Class A fires involving solid combustible materials.
  • Fire ratings like 13A or 21A indicate the size of fire an extinguisher can tackle under test conditions.
  • These extinguishers should never be used on flammable liquids or cooking oil fires.
  • Water lowers the temperature of burning materials below the ignition point, breaking the fire triangle.

Image

What Is the Fire Triangle and How Do Water Extinguishers Disrupt It?

The fire triangle is a fundamental concept in fire safety that explains the three essential elements required for combustion. Heat, fuel and oxygen. Remove any one of these components, and the fire cannot sustain itself.

Water fire extinguishers work by attacking the heat element of the fire triangle. When water makes contact with burning materials, it absorbs tremendous amounts of thermal energy through two processes. Sensible heating occurs as the water temperature rises from ambient to boiling point. Then comes the latent heat of vaporisation, which happens when liquid water transforms into steam. This second process requires approximately 2,260 kilojoules per kilogram, making it exceptionally efficient at removing heat.

This dual absorption process is what makes water so effective at firefighting. As the temperature of the burning material drops below its ignition point, the chemical reactions that sustain combustion can no longer continue. The fire goes out.

Fire Triangle Element Role in Combustion How Water Extinguishers Affect It
Heat Provides energy to sustain combustion Water absorbs heat through sensible heating and the latent heat of vaporisation
Fuel Provides combustible material Water cools fuel below ignition temperature
Oxygen Supports chemical reactions Water creates some displacement, but primarily works through cooling
Fire Triangle Element
Heat
Role in Combustion
Provides energy to sustain combustion
How Water Extinguishers Affect It
Water absorbs heat through sensible heating and the latent heat of vaporisation
Fire Triangle Element
Fuel
Role in Combustion
Provides combustible material
How Water Extinguishers Affect It
Water cools fuel below ignition temperature
Fire Triangle Element
Oxygen
Role in Combustion
Supports chemical reactions
How Water Extinguishers Affect It
Water creates some displacement, but primarily works through cooling

How Does the Stored Pressure Mechanism Work in Water Fire Extinguishers?

Most modern water fire extinguishers in the UK are stored-pressure units. In this design, both the extinguishing agent (water) and the pressurising gas live together in the same cylinder. The pressurising gas is typically compressed air or nitrogen.

When you squeeze the handle of a stored-pressure extinguisher, you open the valve at the top of the cylinder. The compressed gas pushes down on the water, forcing it up through the siphon tube and out through the nozzle. This creates a continuous stream or spray of water directed at the fire.

The pressure inside stays constant throughout the discharge until the extinguisher is empty. You can check this pressure using the gauge mounted on the body. The indicator should show the unit is in the green ‘charged’ zone for the extinguisher to be ready for use.

Stored Pressure vs Cartridge-Operated Stored Pressure (Most Common): Agent and propellant stored together in one cylinder. The pressure gauge shows readiness. Nitrogen or air is used as a propellant.

Cartridge-Operated (Less Common): Agent and propellant stored separately. CO2 cartridge punctured when activated. No pressure gauge. Common in industrial settings.  

Image

What Do Fire Ratings Like 13A and 21A Mean?

Fire ratings on water extinguishers indicate the size and type of fire the unit can extinguish under controlled test conditions. The rating consists of a number followed by a letter. The number represents the fire size. The letter indicates the fire classification.

For Class A fires, test fires are created using a crib of wooden sticks measuring 500mm wide and 546mm high. The crib’s length determines the rating. A 13A rating means the extinguisher successfully extinguished a crib 1.3 metres long under test conditions. A 21A rating means it can tackle a 2.1 metre-long crib.

These tests follow BS EN3, the standard that governs fire extinguisher manufacture and performance in the UK and Europe. After an eight-minute pre-burn, a skilled operator must extinguish the entire test fire with no signs of reignition for at least three minutes. Rigorous testing ensures reliability.

Higher numbers indicate greater firefighting capability. If you need a 13A-rated extinguisher for your premises, a 21A-rated unit will provide even better protection. However, physical size and weight also increase with higher ratings, so there’s always a balance to strike.

Fire Rating Test Crib Length Typical Extinguisher Sizes
8A 0.8 metres 2 litre water mist
13A 1.3 metres 3 litres of water, 6 litres of water, 6 litres of water mist
21A 2.1 metres 6 litre water additive, 9 litre water
27A 2.7 metres 6 litre water additive with enhanced formula
Fire Rating
8A
Test Crib Length
0.8 metres
Typical Extinguisher Sizes
2 litre water mist
Fire Rating
13A
Test Crib Length
1.3 metres
Typical Extinguisher Sizes
3 litres of water, 6 litres of water, 6 litres of water mist
Fire Rating
21A
Test Crib Length
2.1 metres
Typical Extinguisher Sizes
6 litre water additive, 9 litre water
Fire Rating
27A
Test Crib Length
2.7 metres
Typical Extinguisher Sizes
6 litre water additive with enhanced formula

Which Types of Fires Can Water Fire Extinguishers Tackle?

Water fire extinguishers are designed exclusively for Class A fires. These involve ordinary combustible materials that produce ash when burned. Think wood, paper, cardboard, textiles, fabrics and most plastics.

In premises such as offices, schools, warehouses and hotels, Class A fires pose the most significant fire risk. This makes water extinguishers a practical and cost-effective choice for many buildings. They’re often paired with CO2 extinguishers to provide additional coverage for electrical equipment fires as well.

Water extinguishers excel at penetrating deep into burning materials. This allows them to tackle deep-seated fires where heat has penetrated below the surface. 

The water soaks into the material, cooling it throughout and preventing reignition from hot spots lurking beneath.

Some water extinguishers have passed the 35kV dielectric test specified in BS EN3. These units may be marked as suitable for use on live electrical equipment up to 1000V at a distance of one metre.

Image

When Should You Never Use a Water Fire Extinguisher?

Understanding the limitations of water fire extinguishers is as important as knowing their capabilities. You should never use a water fire extinguisher on:

Class B Fires (Flammable Liquids)

Water is denser than most flammable liquids, such as petrol, diesel or paint. It sinks below the liquid surface and fails to create an effective barrier. Worse, the water can cause the burning liquid to splash and spread, worsening the fire rather than extinguishing it.

Class C Fires (Flammable Gases)

Water is ineffective against gas fires. The primary danger with gas fires is the escaping gas itself. Extinguishing the flame without shutting off the gas supply creates an explosion risk as an invisible cloud of gas builds.

Class F Fires (Cooking Oils and Fats)

Water reacts violently with hot cooking oils. When water contacts oil heated above 340°C, it instantly vaporises into steam. This explosive expansion can spray burning oil in all directions, causing severe injuries and spreading the fire throughout the kitchen.

How Do You Operate a Water Fire Extinguisher Safely?

Operating a water fire extinguisher correctly can make the difference between successfully controlling a small fire and allowing it to spread. The standard method uses the PASS technique. It’s simple but effective.

1. Pull the safety pin or break the tamper seal. This unlocks the operating mechanism. Hold the extinguisher upright with the nozzle pointing away from you.

2. Aim the nozzle at the base of the flames, not at the top. Fires burn upwards, but the fuel is at the bottom. Attacking the base cuts off the fire’s fuel source.

3. Squeeze the handle slowly and steadily. This opens the valve and releases the water stream. You should stand at least two to three metres from the fire for safety.

4. Sweep the nozzle from side to side across the base of the fire. Continue sweeping until all visible flames are extinguished. Keep watching for several minutes after the fire is out in case reignition occurs from smouldering materials.

Always ensure you’ve got a clear escape route behind you before attempting to fight any fire. If the fire is larger than a waste paper bin, spreading rapidly, there’s heavy smoke or you feel unsafe, evacuate immediately and call 999. Your life is more valuable than any property.

What’s the Difference Between Water Jet and Water Mist Extinguishers?

Water jet extinguishers discharge a high-pressure stream of water. This stream can reach up to 10 metres, allowing you to fight fires from a safe distance. The powerful jet penetrates deep into burning materials, making it effective against deep-seated fires. However, the concentrated stream covers a smaller surface area at once.

Water mist extinguishers discharge water as a fine mist through a special nozzle. The mist rapidly covers a much larger surface area. This creates a more efficient cooling effect and reduces water damage compared to a jet. The mist also creates a partial barrier between you and the fire, offering better protection from radiant heat.2

How Do Water Mist Extinguishers Differ from Standard Water Extinguishers?

Water mist extinguishers represent an evolution in fire extinguisher technology. They discharge water as microscopic droplets, typically 10-100 microns in diameter. This creates dramatically more surface area compared to standard water streams.

The increased surface area means more efficient heat absorption. Water mist extinguishers can tackle Class A fires just as effectively as standard units, often with smaller capacities. Many water mist models also carry ratings for Class B and Class F fires, making them more versatile than their traditional counterparts.

The microscopic droplets have another crucial advantage. They don’t form a continuous conductive path for electricity. This allows water mist extinguishers to be used safely on live electrical equipment up to 1000V at a distance of 1 metre.

Water mist also causes less collateral damage. The fine droplets evaporate quickly rather than pooling on floors or soaking into furnishings. This makes water mist extinguishers ideal for offices, heritage buildings, museums and other locations where water damage would be costly or devastating to operations.

Why Choose Safelincs

Choosing the proper fire extinguisher for your premises is a critical safety decision that shouldn’t be rushed. At Safelincs, we offer a comprehensive range of water and water-mist fire extinguishers for every application, from small offices to large warehouses.

Our expert team can help you select the correct type and rating for your specific fire risks, ensuring you’re protected without overspending on unnecessary capacity.

We provide delivery, installation and commissioning services to ensure your fire protection meets UK regulations and gives you complete peace of mind. Contact our fire safety specialists today for personalised advice on selecting and placing water fire extinguishers.  

Mel Saunders

Head of Marketing

With over 20 years of experience in content writing, design and marketing, Mel now heads up the Content & Marketing Team at Safelincs. Having been in the fire safety industry for over 5 years, Mel has now developed a deep understanding of some of the critical issues facing the industry. Alongside her team, she aims to support the public with resources and information to help them improve fire safety at home, in the workplace or in 3rd sector organisations.

Latest Posts by Mel Saunders

What Is A Class D Fire?14th May 2026
What Is A Class F Fire?13th May 2026
Ionisation Smoke Alarms Buyers Guide12th May 2026

When Should a Flammables Store Be Used?

A flammable store is required when you store flammable liquids that exceed specific threshold quantities in your workplace. The Dangerous Substances and Explosive Atmospheres Regulations 2002 (DSEAR) require flammable substances to be stored safely to prevent fire, explosion, and harm to people. Proper storage in flammable liquid cabinets helps you comply with these legal requirements and protects your workplace.

Estimated reading time: 5 minutes  

Key Takeaways

  • A flammables store is required when storing flammable liquids above specific quantities in the workplace.
  • DSEAR 2002 requires risk assessments and safe storage of all dangerous substances.
  • HSE guidance recommends 50 litres as a maximum for extremely flammable, highly flammable, and flammable liquids with a flashpoint below ambient temperature in workroom cabinets.
  • Your workplace type, substance classification and risk assessment determine specific storage needs.
  • Flammable stores must meet construction standards, be appropriately located, and be adequately ventilated

Disclaimer: This guide provides general information about flammable storage requirements in the UK. It doesn’t constitute legal or professional advice. Always consult relevant regulations, conduct proper risk assessments, and seek professional guidance for your specific circumstances.  

Image

What Are the Legal Requirements for Storing Flammable Liquids?

The primary legal requirement is compliance with DSEAR 2002. This requires you to eliminate or reduce the risks posed by dangerous substances. You must conduct a risk assessment, provide appropriate storage, ensure proper ventilation and put control measures in place.

The Health and Safety Executive (HSE) enforces these requirements and provides guidance on compliance. Failure to comply can result in prosecution and fines. More importantly, it can lead to serious consequences if an incident occurs.

DSEAR applies to nearly all workplaces and covers any substance that could cause fire or explosion. If you store petrol, solvents, paints or other flammable liquids, you need to follow these rules.

What Storage Thresholds Trigger the Need for a Flammables Store?

Storage thresholds vary depending on the flashpoint and quantity of your liquids. HSE guidance recommends that 50 litres is a maximum for extremely flammable, highly flammable, and flammable liquids with a flashpoint below ambient temperature when stored in workroom cabinets. For flammable liquids with a higher flashpoint (up to 60°C), the recommended maximum is 250 litres.

Understanding how substances are classified helps you determine your storage needs. Under the current GB CLP Regulation, flammable liquids are classified into three categories:

Classification Flashpoint Examples Storage Considerations
Category 1 Below 23°C and boiling point ≤35°C Diethyl ether, pentane Requires dedicated storage even in small quantities
Category 2 Below 23°C and boiling point >35°C Petrol, acetone, methanol, white spirit, and many solvents Dedicated storage recommended; maximum 50 litres in workroom cabinets
Category 3 23°C to 60°C Paraffin (kerosene), diesel, and some oils Storage requirements based on quantity and risk assessment; maximum 250 litres in workroom cabinets for those with flashpoint above ambient
Classification
Category 1
Flashpoint
Below 23°C and boiling point ≤35°C
Examples
Diethyl ether, pentane
Storage Considerations
Requires dedicated storage even in small quantities
Classification
Category 2
Flashpoint
Below 23°C and boiling point >35°C
Examples
Petrol, acetone, methanol, white spirit, and many solvents
Storage Considerations
Dedicated storage recommended; maximum 50 litres in workroom cabinets
Classification
Category 3
Flashpoint
23°C to 60°C
Examples
Paraffin (kerosene), diesel, and some oils
Storage Considerations
Storage requirements based on quantity and risk assessment; maximum 250 litres in workroom cabinets for those with flashpoint above ambient

(Note: The table above reflects current GB CLP classification. Older terminology such as “extremely flammable” and “highly flammable” may still be encountered but refers to the now-superseded CHIP Regulations.)

But that’s guidance, not a rigid rule. Your specific circumstances matter. The type of building, proximity to ignition sources and other factors all play a role.

Your risk assessment determines the appropriate storage method. It considers the specific substances, quantities and workplace conditions. Two workplaces storing the same liquid might need different solutions based on their circumstances.

Which Workplaces Need Flammables Stores?

Any workplace that stores flammable liquids, solvents, paints, adhesives, or chemicals in quantities above safe levels requires appropriate storage. Manufacturing facilities, workshops and laboratories are prominent examples. Maintenance areas, schools, hospitals and even retail environments might need them too.

Small offices aren’t exempt. Even small quantities in communal areas may require proper storage if your risk assessment identifies significant hazards. A cleaning cupboard full of spirit-based cleaners could pose a real risk.

The deciding factor isn’t your workplace type. It’s the substances you store and the risks they present. A school art department with litres of white spirit needs the same care as an industrial paint shop. Same substance, same risks.

Image

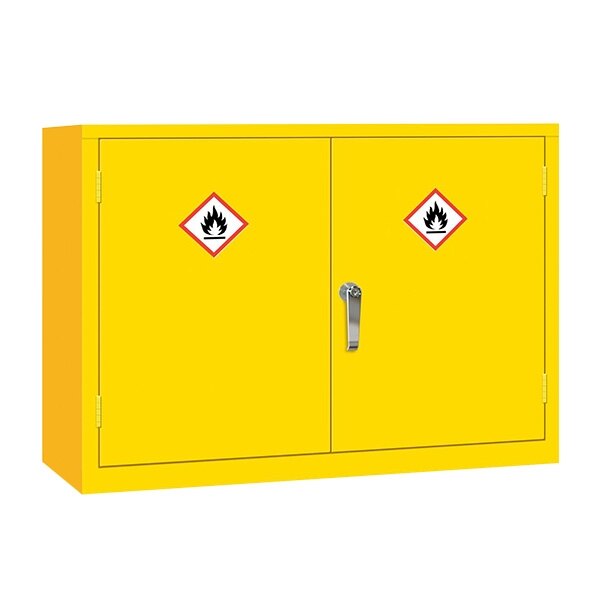
What Makes a Proper Flammables Store?

A proper flammables store is a cabinet constructed from steel with fire-resistant properties. It needs secure locking mechanisms to prevent unauthorised access. You don’t want untrained people handling dangerous substances.

The cabinet must provide spill containment capable of retaining 110% of the volume of the largest container stored inside. Flammable liquids that leak can spread quickly and create a significant hazard. Adequate ventilation prevents vapour accumulation inside the cabinet. The vapours are often more dangerous than the liquid itself.

Clear labelling matters. Everyone needs to know what’s inside and what hazards they’re dealing with. Position the cabinet away from ignition sources, escape routes, and high-traffic areas. You don’t want a flammables store blocking your fire exit or sitting next to a boiler.

Size and capacity should match your storage needs without encouraging overstocking beyond safe limits.

How Do COSHH Regulations Affect Flammable Storage?

The Control of Substances Hazardous to Health Regulations 2002 (COSHH) overlap with DSEAR requirements for many flammable substances. COSHH focuses on health risks from substances, while DSEAR focuses on fire and explosion risks. Many flammable liquids are covered by both sets of regulations.

You must assess the health risks posed by your substances and prevent or control exposure. That means maintaining your control measures and providing your staff with proper information and training. Not optional extras.

A flammable liquid that emits harmful vapours requires storage that addresses both concerns. Your cabinet must prevent fire risks under DSEAR and health risks under COSHH. That’s why proper ventilation is so important. It tackles both vapour accumulation and exposure in one go.

Need Help With Flammable Storage?

Choosing the proper storage solution can feel complicated. The regulations overlap, and your specific needs depend on many factors. Getting it right protects your people and your premises, though.

We’ve helped thousands of businesses find the right flammable storage solutions. Our team understands the regulations and can guide you through your options. Contact us for expert advice on keeping your workplace safe.  

Mel Saunders

Head of Marketing

With over 20 years of experience in content writing, design and marketing, Mel now heads up the Content & Marketing Team at Safelincs. Having been in the fire safety industry for over 5 years, Mel has now developed a deep understanding of some of the critical issues facing the industry. Alongside her team, she aims to support the public with resources and information to help them improve fire safety at home, in the workplace or in 3rd sector organisations.

Latest Posts by Mel Saunders

What Is A Class D Fire?14th May 2026
What Is A Class F Fire?13th May 2026
Ionisation Smoke Alarms Buyers Guide12th May 2026

Why is my smoke alarm beeping?

Key Takeaways

  • A continuous alarm may mean smoke, dust, dirt, damage or an alarm that’s passed its 10 year lifespan.
  • Intermittent beeping or chirping usually signals a low battery, and this is more common at night when temperatures drop.
  • Mains powered smoke alarms have backup batteries that can chirp when they run low.
  • You should replace smoke alarms every 10 years because the sensors deteriorate over time.
  • Placing your alarm in the wrong spot (near kitchens, bathrooms or draughty areas) can trigger false alarms.
  • We offer replacement options for discontinued models, often without needing an electrician.

Is your smoke alarm beeping in the night and keeping you awake? Or perhaps it’s disturbing your day? Whether you’ve got mains powered interlinked smoke alarms or battery powered ones, follow our guidance below to troubleshoot the beeping and get some peace back.

What Type of Sound Is Your Smoke Alarm Making?

Before you start troubleshooting, work out what type of sound your smoke alarm is making. This’ll help you pinpoint the cause and find the right fix.

Note: Beep patterns vary by manufacturer and model. Always check your alarm’s user manual for the specific meanings of different sounds.  

Sound Type Pattern Likely Cause Urgency
Continuous loud alarm Non-stop sounding Smoke or fire detected, dust or fault High: check for fire straight away
Intermittent chirping Single beep every 30 to 60 seconds Low battery Medium: replace battery soon
Rapid beeping Multiple quick beeps End of life warning or malfunction Medium: replace alarm
Sound Type
Continuous loud alarm
Pattern
Non-stop sounding
Likely Cause
Smoke or fire detected, dust or fault
Urgency
High: check for fire straight away
Sound Type
Intermittent chirping
Pattern
Single beep every 30 to 60 seconds
Likely Cause
Low battery
Urgency
Medium: replace battery soon
Sound Type
Rapid beeping
Pattern
Multiple quick beeps
Likely Cause
End of life warning or malfunction
Urgency
Medium: replace alarm
Image

Why Is My Smoke Alarm Sounding Continuously?

A smoke alarm that won’t stop sounding needs your attention straight away. Follow these steps to work out what’s going on.

First, check there’s no smoke or fire in your property.

If there’s no fire, look into these common causes:

Could it be another alarm? Make sure the beeping is definitely coming from your smoke alarm. Other alarms in your home, such as a carbon monoxide alarm or burglar alarm, could be making the noise.

Is dust or dirt setting it off? Give the alarm a clean if it’s dusty or dirty. Vacuum around the alarm or use a hairdryer on a cool setting to blow out any dust from the sensor chamber.

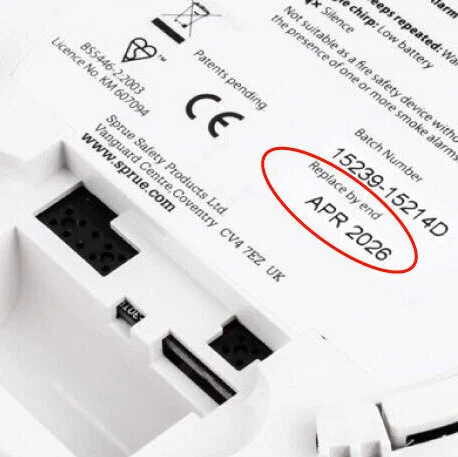
Has your smoke alarm reached its expiry date? Check the “replace by” or manufacture date on the back of your alarm. Smoke alarms last a maximum of 10 years. If the manufacturing date is approaching or past 10 years, it’s time for a new one. The sensors inside deteriorate after this point, making the alarm less effective at detecting fires.

Is your alarm in the wrong spot? Different sensor types work best in different locations. An optical smoke alarm in a kitchen, for example, may go off from cooking fumes.

Could the alarm be damaged or faulty? Water, fire, grease and certain paints can all cause faults. If you think there’s damage, replace your smoke alarm straight away to keep your home and family safe.  

Why Is My Battery Smoke Alarm Chirping Intermittently?

An intermittent chirp or beep (typically once every 30 to 60 seconds) almost always means a low battery. Here’s what to do.

Replace the battery. Make sure you’re using the right battery type and inserting it the right way round. A low battery is more likely to sound at night because a drop in room temperature reduces its ability to power the alarm.

Check how old your alarm is. Smoke alarms last a maximum of 10 years. If the manufacturing date on yours is approaching or past 10 years, it’s time for a replacement. Even with a fresh battery, an old alarm may chirp because the sensors are wearing out.

Look for signs of damage. Water, fire, grease and certain paints can cause faults. If you suspect a problem, replace your smoke alarm straight away.  

Smoke Alarm Battery Types and Lifespan
Battery Type Typical Lifespan When To Replace
Alkaline 9V (PP3) 12 to 18 months We recommend annually, or every 6 months for maximum safety
Alkaline AA 12 to 18 months We recommend annually
Lithium 9V Up to 5 years When it starts chirping
Sealed lithium (10 year) 10 years Replace the entire alarm
Battery Type
Alkaline 9V (PP3)
Typical Lifespan
12 to 18 months
When To Replace
We recommend annually, or every 6 months for maximum safety
Battery Type
Alkaline AA
Typical Lifespan
12 to 18 months
When To Replace
We recommend annually
Battery Type
Lithium 9V
Typical Lifespan
Up to 5 years
When To Replace
When it starts chirping
Battery Type
Sealed lithium (10 year)
Typical Lifespan
10 years
When To Replace
Replace the entire alarm

Buy replacement smoke alarm batteries so your family gets alerted if there’s ever a fire in your home.

Why Is My Mains Powered Smoke Alarm Chirping Intermittently?

All new or recently extended homes should have mains powered interlinked alarms fitted. These also contain a backup battery to keep you protected during power cuts. Some makes/models contain replaceable batteries, whereas some have sealed batteries which cannot be replaced. Please check your user manual for more information.

The most common cause of chirping in mains powered alarms is a low backup battery.

Even though your alarm connects to the mains electricity, you’ll still need to replace the backup battery from time to time. Here’s how to stop the chirping:

  • Locate the battery compartment (usually by twisting the alarm off its base)
  • Replace the backup battery with the correct type for your alarm
  • Press the test button to check it’s working

If your alarm keeps chirping after you’ve replaced the backup battery, it may have reached the end of its 10 year lifespan and need replacing altogether.

Image

What Replacement Batteries Do Smoke Alarms Need?

Smoke alarms typically need one of these battery types:

  • Alkaline AA batteries (usually two)
  • Alkaline 9V battery (PP3)
  • Lithium 9V battery (lasts longer)

Check the label on your smoke alarm or look in the user manual to confirm the right type. Using the wrong battery can cause problems or void your warranty.

How Do I Replace a Mains Powered Smoke Alarm?

You should replace smoke alarms after 10 years, whether they’re mains powered or battery powered. The sensors deteriorate over time. Battery alarms are easy to swap out, but what about mains powered ones?

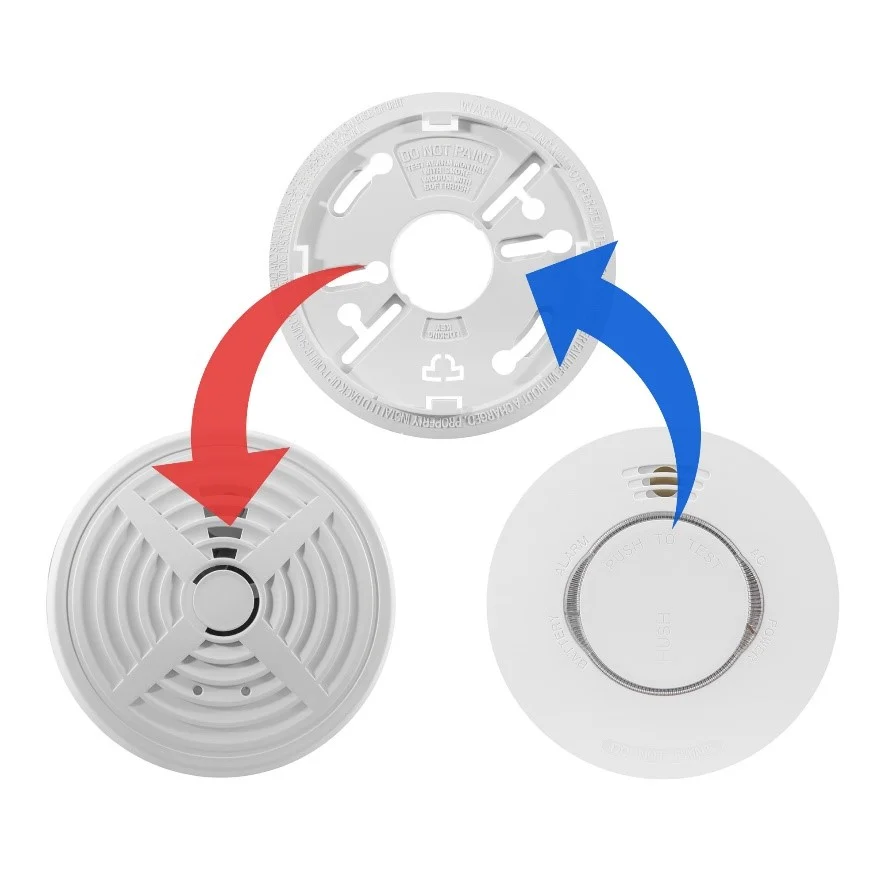
Good news: you can replace most mains powered alarms without calling an electrician if you buy the exact same model (if it’s still available) or an Easichange® replacement.

Learn why you should replace smoke alarms after 10 years.  

What If My Smoke Alarm Model Has Been Discontinued?

Need a replacement but can’t find your model anymore? We offer a dedicated collection of replacement smoke and heat alarms. We’ve chosen these specifically to be the simplest, most direct replacements, and you can often fit them without needing an electrician.

How Can I Prevent False Alarms?

The sensor type in your alarm determines where you should put it. False alarms often happen because the wrong alarm type is too close to a steamy, dusty or smoky area.

Where Should Different Smoke Alarm Types Go?
Alarm Type Best Locations Keep Away From
Heat alarms Kitchens, garages, dusty workshops Bedrooms, hallways (use smoke alarms there instead)
Optical smoke alarms Bedrooms, living rooms, hallways Kitchens, bathrooms, garages
Ionisation smoke alarms (discontinued) Landings, hallways Areas near kitchens or bathrooms
Alarm Type
Heat alarms
Best Locations
Kitchens, garages, dusty workshops
Keep Away From
Bedrooms, hallways (use smoke alarms there instead)
Alarm Type
Optical smoke alarms
Best Locations
Bedrooms, living rooms, hallways
Keep Away From
Kitchens, bathrooms, garages
Alarm Type
Ionisation smoke alarms (discontinued)
Best Locations
Landings, hallways
Keep Away From
Areas near kitchens or bathrooms

Spots to Avoid When Fitting Smoke Alarms

To prevent false alarms or poor performance, don’t fit alarms in these spots:

  • Next to doors, windows, air vents or fans that create a draught
  • Outside or in unheated spaces
  • Anywhere curtains or furniture would block the airflow
  • Steamy or humid rooms like shower rooms
  • In kitchens (use a heat alarm instead of a smoke alarm)

Find out which smoke alarm works best in each room.  

Quick Troubleshooting Summary
Problem What To Do
Continuous alarm with no fire Clean the alarm, check its position or replace it if it’s over 10 years old
Intermittent chirping (battery alarm) Replace the battery straight away
Intermittent chirping (mains alarm) Replace the backup battery – if your unit has a replaceable battery inside.
Alarm over 10 years old Replace the whole unit
Frequent false alarms Check where it’s positioned and consider a different alarm type
Discontinued alarm needs replacing Use an Easichange® or compatible replacement
Problem
Continuous alarm with no fire
What To Do
Clean the alarm, check its position or replace it if it’s over 10 years old
Problem
Intermittent chirping (battery alarm)
What To Do
Replace the battery straight away
Problem
Intermittent chirping (mains alarm)
What To Do
Replace the backup battery – if your unit has a replaceable battery inside.
Problem
Alarm over 10 years old
What To Do
Replace the whole unit
Problem
Frequent false alarms
What To Do
Check where it’s positioned and consider a different alarm type
Problem
Discontinued alarm needs replacing
What To Do
Use an Easichange® or compatible replacement

Don’t wait to change or replace a faulty smoke alarm. It’s one of the most important things you can do to keep your home and family safe. If you need any help, call our customer service team on 0800 612 6537 or email us.

Mel Saunders

Head of Marketing

With over 20 years of experience in content writing, design and marketing, Mel now heads up the Content & Marketing Team at Safelincs. Having been in the fire safety industry for over 5 years, Mel has now developed a deep understanding of some of the critical issues facing the industry. Alongside her team, she aims to support the public with resources and information to help them improve fire safety at home, in the workplace or in 3rd sector organisations.

Latest Posts by Mel Saunders

What Is A Class D Fire?14th May 2026
What Is A Class F Fire?13th May 2026
Ionisation Smoke Alarms Buyers Guide12th May 2026

How to Control a Flammable Liquid Fire

Key Takeaways

  • Flammable liquid fires (Class B) involve petrol, diesel, oils, paints and alcohol, and can ignite from a single spark or open flame.
  • Never use water on a flammable liquid fire, as it can spread the flames and cause dangerous reactions.
  • Foam, CO2 and dry powder extinguishers are the three effective options for tackling Class B fires.
  • The PASS technique (Pull, Aim, Squeeze, Sweep) is the universal method for operating fire extinguishers safely.
  • Only fight flammable liquid fires if they’re small, contained and you have a clear escape route.
  • Prevention through proper storage and keeping flammable liquids away from ignition sources is your best defence.

When petrol, paint thinners or oils catch fire, you’re facing one of the most dangerous and fast-spreading fire types. Flammable liquid fires can escalate in seconds. Using the wrong approach can make things far worse. If you’ve ever wondered what you’d do if faced with burning fuel or oil, you’re not alone. Knowing how to control these fires safely could save lives and property.  

Understanding Flammable Liquid Fires (Class B)

In the UK, fires involving flammable liquids are classified as Class B fires. These include petrol, diesel, oils, alcohol, paraffin, certain paints and some solvents. What makes these fires so hazardous is their ability to spread rapidly and produce intense heat.

These liquids have low flash points. This means they can ignite from a single spark or open flame. Think about why you see “No Smoking” signs at petrol stations. The danger comes from the open flame of a lighter or match used to light a cigarette, which can ignite flammable vapours in the surrounding air.

Flammable liquids can quickly vaporise when burning, mixing with oxygen in the air to create an even greater fire hazard. The fire doesn’t just burn on the surface. The vapours themselves become fuel, which is why these fires can seem to “jump” or spread so quickly.

Image

Why Water is Your Enemy With Flammable Liquid Fires

Here’s something you need to know: never, ever use water on a flammable liquid fire.

When water comes into contact with burning oil or fuel, it vaporises into steam. This spits out the burning liquid, intensifying the fire. Remember your school science lessons? Oil and water don’t mix. Water is denser than most flammable liquids, so it sinks beneath them, then rapidly turns to steam. This creates an explosive ball of flames that spreads the fire further.

Using water on a Class B fire isn’t just ineffective; it’s dangerous. It’s risky and can turn a manageable situation into a life-threatening emergency.

Choosing The Right Fire Extinguisher For Flammable Liquids

For tackling Class B fires safely, you’ve got three effective options. Each works differently. Understanding these differences helps you make the right choice for your environment.

Foam Extinguishers (Cream Label)

Foam extinguishers work by creating a barrier over the surface of the flammable liquid, cutting off its oxygen supply and cooling the fire. They’re effective for contained liquid fires: think of fuel in a container or a spill that hasn’t spread.

Foam provides lasting protection and can even be applied to liquids in tanks to shield them from ignition from other sources. However, they’re not suitable for free-flowing or “running” liquid fires.

CO2 Extinguishers (Black Label) 

Carbon dioxide extinguishers displace oxygen, suffocating the fire. They’re brilliant because they leave no residue, making them ideal for areas with sensitive equipment. They’re also safe to use on electrical fires, making them a versatile choice.

One important note: the nozzle of a CO2 extinguisher becomes very cold during discharge and can cause frost burns. Never touch it with your bare hands. Always hold the extinguisher by the handle.

Dry powder extinguishers (blue label)

Powder extinguishers are multipurpose units that can tackle Class A, B and C fires. They’re effective for uncontained or “spill” fires where liquid is running.

However, they create visibility issues due to the fine powder cloud, and they don’t cool the fire. This means reignition is possible. They’re generally not recommended for indoor use unless necessary.

You can explore the full range of fire extinguishers suitable for your needs to ensure you’re appropriately protected.  

How to Control a Flammable Liquid Fire: The PASS Technique

When using any fire extinguisher, the PASS technique is your essential guide: Pull, Aim, Squeeze, and Sweep. This method works for all extinguisher types and helps you remember the steps when you’re under stress.

1

Step 1: Pull The Safety Pin

Pull out the pin from the top of the extinguisher. This may require a slight twisting action as well as pulling. This safety pin prevents accidental discharge, so removing it activates the extinguisher and allows you to use the trigger.

2

Step 2: Aim at The Base

Aim the nozzle or horn of the extinguisher at the base of the flames, not at the fire itself. This is crucial because the base is where the fuel is burning. If you aim higher up at the fire, you’re wasting your extinguishing agent and won’t put it out effectively.

For flammable liquid fires, maintain a safe distance. Approximately two to three metres is a general guideline, though this may vary depending on the extinguisher type. This protects you from the heat and any potential splashing or spreading of the burning liquid.

3

Step 3: Squeeze The Handle

Firmly squeeze the trigger or handle to discharge the extinguishing agent, applying steady, even pressure to maintain a continuous, controlled flow. Don’t pump it or squeeze intermittently. You want a consistent stream.

4

Step 4: Sweep Across The Fire

Sweep the nozzle from side to side across the base of the fire, covering the entire burning area with the extinguishing agent. Continue this sweeping motion until the flames are fully extinguished, and don’t stop until the extinguisher is empty. This helps prevent reignition.

Note that with oil and fat fires, you should avoid the standard PASS technique as the force can spread the burning liquid. For cooking oil fires, a wet chemical extinguisher or fire blanket is more appropriate.

Image

What You Need to Check Before You Fight The Fire

Before you even reach for an extinguisher, assess whether it’s safe to fight the fire. Here’s your mental checklist:

Only attempt to fight a flammable liquid fire if

  • The fire is small and contained (no larger than a waste bin).
  • You have the correct type of extinguisher for Class B fires.
  • You have a clear escape route behind you with no smoke, flames or heat blocking your exit.
  • The fire service has been called.
  • You feel confident and have received proper training.

You must have an established evacuation path. Ensure that no fire, smoke or heat obstructs your escape route. Your safety always comes first.

If the fire is spreading rapidly, producing thick smoke, or if you have any doubt about your ability to extinguish it, evacuate and leave it to the professionals. There’s no shame in getting out. It’s the wise decision.

Image

When Flammable Liquid Fires Are Too Dangerous to Fight

Fire extinguishers should only be used for small fires that you’re confident you can handle yourself. Some situations demand evacuation:

  • The fire is larger than you are.
  • Flames are spreading to other materials or areas.
  • Thick smoke is filling the room.
  • You can hear crackling or explosive sounds.
  • The heat is intense, even from several metres away.
  • Multiple containers of flammable liquids are nearby.
  • You don’t have the correct type of extinguisher.

In these scenarios, sound the fire alarm, evacuate everyone, close doors behind you (but don’t lock them) and call 999 once you’re safely outside.

Preventing Flammable Liquid Fires in The First Place

Of course, the best way to control a flammable liquid fire is to prevent one from starting. Here’s how you can seriously reduce your risk:

Storage Matters

Store all flammable liquids safely in appropriate containers, well away from any ignition sources such as heaters, electrical equipment or open flames. Purpose-built flammable liquid storage cabinets create a temporary barrier between a potential fire and the contents, buying time for evacuation.

Control Ignition Sources

Keep flammable liquids away from sparks, hot surfaces, smoking areas and any equipment that could generate heat. In garages and workshops, this means proper separation and clear signage.

Ventilation is Vital

Flammable liquid vapours can accumulate in poorly ventilated spaces, creating an invisible fire hazard. Ensure adequate airflow wherever you store or use these materials.

Regular Inspections

Check containers for leaks, damage or deterioration. A small leak today could be a significant fire hazard tomorrow.

Proper Training

Everyone who handles flammable liquids should receive training on safe handling, storage and emergency response procedures.

Ensuring Your Fire Safety Equipment Is Ready

Having the correct fire extinguishers is only half the battle. They need to be adequately maintained and serviced so they work when you need them most. The Regulatory Reform (Fire Safety) Order 2005 requires fire safety equipment to be kept in good working order.

Professional fire extinguisher servicing ensures your equipment will function correctly in an emergency. Annual servicing checks pressure, examines seals, tests discharge mechanisms, and verifies that each extinguisher is suitable for the fire risks at its location.  

Your Next Steps For Flammable Liquid Fire Safety

Controlling a flammable liquid fire safely requires the proper knowledge, the correct equipment and an honest assessment of the situation. Remember: foam, CO2, or dry powder extinguishers only, never water. Use the PASS technique, aim at the base and always prioritise your escape route.

But more importantly, invest in prevention. Proper storage, regular inspections and appropriate fire safety equipment create layers of protection that can stop fires before they start.

Need expert guidance on fire safety for your premises, or unsure which fire extinguishers you need? Our team is ready to help you today. Get in touch with us for personalised advice on protecting your property and people from flammable liquid fires.  

Mel Saunders

Head of Marketing

With over 20 years of experience in content writing, design and marketing, Mel now heads up the Content & Marketing Team at Safelincs. Having been in the fire safety industry for over 5 years, Mel has now developed a deep understanding of some of the critical issues facing the industry. Alongside her team, she aims to support the public with resources and information to help them improve fire safety at home, in the workplace or in 3rd sector organisations.

Latest Posts by Mel Saunders

What Is A Class D Fire?14th May 2026
What Is A Class F Fire?13th May 2026
Ionisation Smoke Alarms Buyers Guide12th May 2026

10 Things You Should Know About Fire Doors

Key Takeaways

  • Fire doors contain fire and smoke in the room where a fire starts.
  • FD30 fire doors resist fire for 30 minutes and FD60 doors provide 60-minute protection.
  • You need fire doors in all non-domestic properties, flats and houses of multiple occupancy.
  • Intumescent strips expand when heated to seal gaps between the door and frame.
  • A competent person must fit fire doors to ensure they work correctly.
  • Using wedges or props to hold fire doors open is illegal and dangerous.
  • Fire door retainers like Dorgard let you hold fire doors open legally.
  • You should inspect and maintain fire doors regularly, with frequency based on building type and risk.
  • You can paint fire doors with standard decorative paint without affecting their rating.
  • Building regulations specify where you need fire doors in domestic properties.

Most of us walk through fire doors every day at home, at work or in public buildings. But how much do you actually know about them? We’ve put together expert answers to the most common fire door questions based on what customers ask our fire safety specialists. You can also read more about the role of fire doors in buildings.

Image

What Makes Fire Doors So Important for Building Safety?

Fire doors keep fire and smoke contained in the room where a fire starts. They stop flames and toxic smoke from spreading to other parts of the building. This makes them a key part of any building’s passive fire protection, working alongside fire alarms, emergency lighting and escape routes to protect lives and property.

What Do Fire Doors Actually Do?

Fire doors do three things that save lives and reduce property damage:

  • They compartmentalise buildings: Fire stays in the room where it starts
  • They protect escape routes: Corridors and stairways stay clear from fire, giving people more time to evacuate and giving firefighters better access
  • They limit damage: The rest of the building, its contents and neighbouring properties stay protected  

How Do Fire Doors Work to Prevent Fire Spread?

Fire doors stop fire from spreading for a set period. Manufacturers build them from materials that withstand fire for either 30 minutes or 60 minutes, depending on the rating.

Every fire door has intumescent strips fitted in a groove around its edges. When a fire breaks out, heat makes these strips expand rapidly. They fill the gap between the door and frame, seal the room and stop fire spreading for the rated time.

Here’s the thing: a fire door only works if it’s closed when fire breaks out. So you should always fit your fire door with an automatic fire door closer and the right signage.  

Image

How Are Fire Doors Made and Certified?

Fire doors are thicker than standard doors. Most have a solid core made from various materials. Construction varies between manufacturers, but every door must be tested and certified to withstand fire for at least 30 minutes.

Here’s how certification works:

1. Manufacturers send their fire door and frame designs for testing as a complete set at an approved testing centre

2. After successful testing, the design goes forward for certification

3. Once approved, every fire door set built to those specifications gets a certification label

Where to find certification information:
Information on Label Location
Manufacturer details Top edge of door
Date of manufacture Top edge of door
Fire rating (FD30/FD60) Top edge of door
Certification scheme Top edge of door
Information on Label
Manufacturer details
Location
Top edge of door
Information on Label
Date of manufacture
Location
Top edge of door
Information on Label
Fire rating (FD30/FD60)
Location
Top edge of door
Information on Label
Certification scheme
Location
Top edge of door
Image

How Long Do Fire Doors Hold Back Fire?

Manufacturers test fire doors and frames to hold back fire for specific periods:

Fire Door Rating Fire Resistance Time Typical Use
FD30 30 minutes Homes, flats, offices
FD60 60 minutes Higher-risk areas, care homes, escape routes
FD90+ 90+ minutes Specialist applications (rarely needed)
Fire Door Rating
FD30
Fire Resistance Time
30 minutes
Typical Use
Homes, flats, offices
Fire Door Rating
FD60
Fire Resistance Time
60 minutes
Typical Use
Higher-risk areas, care homes, escape routes
Fire Door Rating
FD90+
Fire Resistance Time
90+ minutes
Typical Use
Specialist applications (rarely needed)

How well a fire door performs depends on proper installation with the right seals and fire-rated hardware, including fire door closers. Fire doors in busy areas can wear out over time, so check them regularly and sort out any maintenance issues quickly. The Fire Safety (England) Regulations 2022 set specific inspection frequencies for residential buildings over 11m.

Browse our range of FD30 and FD60 fire doors to find certified options for your building.  

Image

Are Fire Doors a Legal Requirement in the UK?

Yes. You need fire doors in all non-domestic properties: businesses, commercial premises and public buildings. They’re also mandatory in residential flats and houses of multiple occupancy.

The Regulatory Reform (Fire Safety) Order 2005 says building operators in England and Wales must appoint a Responsible Person to manage fire safety. Part of their job is reducing the risk of fire spreading through the building.

Your fire risk assessment should identify:

  • Where you need fire doors
  • What rating each door should have
  • Any extra requirements like smoke seals (FD30s/FD60s)

Do I Need Fire Doors in My House or Flat?

Fire-rated doors add valuable protection in domestic properties. Here’s what you need to know.

Houses and Bungalows

Building regulations set out where you need fire doors:

Situation What You Need
New builds or renovations with 3+ floors Fire doors on every habitable room leading from a stairwell
Loft conversions creating a third floor Fire doors on rooms leading from the stairwell
Door between your home and integral garage Must be a fire door
Standard two-storey homes Not legally required, but worth considering
Situation
New builds or renovations with 3+ floors
What You Need
Fire doors on every habitable room leading from a stairwell
Situation
Loft conversions creating a third floor
What You Need
Fire doors on rooms leading from the stairwell
Situation
Door between your home and integral garage
What You Need
Must be a fire door
Situation
Standard two-storey homes
What You Need
Not legally required, but worth considering

FD30 fire doors work well in most domestic situations.

Flats and HMOs

Your building should have a fire risk assessment that specifies door requirements. Building Regulations Approved Document B (Volume 1: Dwellings) sets these standards.

Flat Location What You Need
Entrance door onto communal areas FD30 fire door
Flats 4.5m+ above ground level Fire doors between all habitable rooms, plus entrance door
Ground floor flats Fire door at entrance if it opens onto a communal area. You usually don’t need internal fire doors if each room has an escape route
Flat Location
Entrance door onto communal areas
What You Need
FD30 fire door
Flat Location
Flats 4.5m+ above ground level
What You Need
Fire doors between all habitable rooms, plus entrance door
Flat Location
Ground floor flats
What You Need
Fire door at entrance if it opens onto a communal area. You usually don’t need internal fire doors if each room has an escape route
Image

Can I Paint Fire Doors?

Yes. You can use regular decorative paint or varnish on fire doors without affecting how they perform. You don’t need special fire-resistant paint.

What to avoid when painting:

  • Don’t use heat or chemical paint strippers near intumescent seals
  • Don’t paint over hinges, hardware or seals
  • Don’t apply so many coats that the door can’t close properly

What about style?

You don’t have to sacrifice looks. Fire doors come in various finishes: real wood veneer (oak, walnut, ash, sapele), Formica laminate and pre-painted RAL colours.

Can I Leave Fire Doors Open Legally?

Only if you use approved devices like a fire door retainer or hold-open free-swing door closer.

Never prop or wedge fire doors open. It’s dangerous and illegal. Fire doors have self-closing devices so they shut automatically if fire breaks out. If you wedge a fire door open, it can’t stop fire spreading.

Legal Ways to Hold Fire Doors Open

Fire door retainers like Dorgard give you a practical, legal solution when you need fire doors to stay open for accessibility or ventilation:

Product How It Works Best For
Dorgard Fire Door Retainer Plunger releases at 65dB when fire alarm sounds Retrofitting existing doors
Free-swing door closer Door moves freely but closes automatically when alarm activates High-traffic areas, care homes
Electromagnetic holders Wired to fire alarm panel and releases when power cuts New builds, noisy environments
Product
Dorgard Fire Door Retainer
How It Works
Plunger releases at 65dB when fire alarm sounds
Best For
Retrofitting existing doors
Product
Free-swing door closer
How It Works
Door moves freely but closes automatically when alarm activates
Best For
High-traffic areas, care homes
Product
Electromagnetic holders
How It Works
Wired to fire alarm panel and releases when power cuts
Best For
New builds, noisy environments
Image

Dorgard Fire Door Retainers

  • Hold fire doors open legally at any angle
  • Wire-free plunger-based design
  • BS EN 1155:1997 and BS EN 1634-1
  • Triggered acoustically at 65dB
  • FREE extended 5-year warranty
  • FREE shipping

£89.58 ex VAT | £107.50 inc VAT

Who Can Install Fire Doors?

A competent person with relevant training, experience and joinery skills must fit fire doors. Whatever a fire door’s rating, poor installation could mean it fails within five minutes.

Key installation requirements:

  • Gap between fire door and frame: no more than 4mm at the top and sides (with 2-4mm being the industry standard)
  • Intumescent seals positioned correctly
  • Fire-rated hinges and hardware fitted properly
  • Door closes fully and latches correctly

The Code of Practice for Fire Door Assemblies doesn’t require installers to hold specific certification. But the Fire Safety Order says a competent person must carry out the work: someone with the right training, experience, qualifications and knowledge.

Professional Fire Door Installation

Using qualified installers gives you confidence that everything meets requirements and your fire door will work when it matters.

Image

Our Fire Door Installation Service

  • Nationwide service by certified fire door installers
  • We install all fire door sets and hardware purchased from Safelincs
  • Complete fire door and frame installation available
  • Experienced installers who know what they’re doing

£719.79 ex VAT | £863.75 inc VAT

Frequently Asked Questions

What is the difference between FD30 and FD60 fire doors?
FD30 fire doors resist fire for 30 minutes. FD60 fire doors give you 60 minutes of protection. FD60 doors are thicker (54mm compared to 44mm) and you’ll find them in higher-risk locations like care homes and commercial escape routes. Most homes need FD30 doors.
How often should I inspect fire doors?
Inspection frequency depends on building type. The Fire Safety (England) Regulations 2022 require quarterly checks for communal fire doors in residential buildings with storeys over 11 metres in height, and annual checks (on a best endeavours basis) for flat entrance doors. BS 9999 and the British Woodworking Federation recommends six-monthly checks as general guidance, with more frequent checks in high-traffic areas.
Can I fit a fire door myself?
We don’t recommend it. Fire door installation needs precise fitting with 2-4mm gaps, correct seal placement and fire-rated hardware. Get it wrong and your fire door won’t work. A competent installer makes sure your door meets legal requirements and performs correctly.
What happens if someone props fire doors open illegally?
Propping fire doors open is a serious offence under UK fire safety law. The Responsible Person could face prosecution, substantial fines and even a prison sentence. But here’s what really matters: wedged-open fire doors can’t contain fire, and that can cost lives.
Do fire doors need intumescent strips?
Yes. Intumescent strips are essential. They fit around the door edges and expand when they get hot, sealing the gap between door and frame. Without properly fitted intumescent seals, your fire door can’t achieve its rated fire resistance.

Ask a Question

Still got questions about fire doors? Ask one of our experts on our fire safety forum.

All information correct at time of publication.

Mel Saunders

Head of Marketing

With over 20 years of experience in content writing, design and marketing, Mel now heads up the Content & Marketing Team at Safelincs. Having been in the fire safety industry for over 5 years, Mel has now developed a deep understanding of some of the critical issues facing the industry. Alongside her team, she aims to support the public with resources and information to help them improve fire safety at home, in the workplace or in 3rd sector organisations.

Latest Posts by Mel Saunders

What Is A Class D Fire?14th May 2026
What Is A Class F Fire?13th May 2026
Ionisation Smoke Alarms Buyers Guide12th May 2026

Identifying and Addressing A Fire: What to Look Out For

Key Takeaways

  • Recognising early warning signs like unusual smells, smoke, heat or electrical issues can give you vital seconds to respond safely.
  • Different fires produce distinct characteristics that help you identify the fuel source and choose the proper response.
  • Your immediate priority when discovering a fire is to raise the alarm and assess whether it’s safe to tackle or if evacuation is necessary.
  • Small fires in their early stages can sometimes be extinguished safely, but never put yourself at risk trying to fight a fire beyond your control.
  • Proper detection equipment and regular maintenance are your first line of defence in identifying fires before they spread.

Every year, fires cause devastating damage to homes and businesses across the UK. The difference between a minor incident and a catastrophe often comes down to one thing: how quickly someone spots the signs and takes action.

You don’t need to be a fire safety expert to recognise when something’s wrong. But knowing what to look for can literally save lives.

We will walk you through the warning signs that indicate a fire is developing, help you understand what you’re dealing with and explain how to respond safely. Whether you’re responsible for a workplace or simply want to protect your home, understanding fire behaviour is one of the most valuable skills you can have.

Early Warning Signs: Spotting Trouble Before It Starts

Fires rarely appear without warning. There’s usually a progression of signs that something’s going wrong. Catching these early gives you the best chance of preventing disaster.

Unusual Smells

Your nose is often your first line of defence.

Electrical fires produce a distinctive acrid smell, often described as burning plastic or rubber. You might notice this before you see any smoke. If you detect burning odours that you can’t immediately identify, don’t ignore them. Track down the source straight away.

Smouldering fires produce a different scent, often like burning paper or something musty. This can happen when something’s been left too close to a heat source or when materials are overheating without visible flames.

Smoke and Discolouration

Smoke is the most obvious warning sign, but not all smoke looks the same.

Thick black smoke typically indicates burning synthetic materials or oils. White or grey smoke often comes from burning wood, paper or fabric. You might also notice discolouration on walls or ceilings: yellow or brown staining that suggests heat damage or smoke exposure over time.

Heat and Sound

Before you see flames, you’ll often feel unusual heat. Walls, doors or floors that feel hot to the touch indicate fire on the other side.

You might also hear crackling, popping or hissing sounds that signal combustion.

Electrical Warning Signs

Flickering lights, sparking outlets or circuit breakers that keep tripping are all red flags. If you notice scorch marks around switches or outlets, or if plugs feel hot after being in use, these are severe warning signs. Don’t dismiss them.

Did You Know?

Many electrical fires start in areas people rarely check: behind walls, in roof spaces or inside appliances. Regular electrical inspections can catch problems before they become dangerous. In England, accidental electrical fires account for over half of all dwelling fires, making them one of the most common fire hazards in UK homes.

Understanding What You’re Dealing With

Once you’ve identified a fire, understanding the type you’re facing helps you make better decisions about how to respond.

UK Fire Classifications
Fire Class Fuel Type Examples Suitable Extinguishers
Class A Ordinary combustibles Wood, paper, fabric, plastics Water, foam, water mist
Class B Flammable liquids Petrol, oil, paint, solvents Foam, CO2, dry powder
Class C Flammable gases Propane, butane, natural gas Dry powder
Class F Cooking oils and fats Deep fat fryers, cooking oil Wet chemical
Electrical Electrical equipment Appliances, wiring, distribution boards CO2, dry powder, water mist
Fire Class
Class A
Fuel Type
Ordinary combustibles
Examples
Wood, paper, fabric, plastics
Suitable Extinguishers
Water, foam, water mist
Fire Class
Class B
Fuel Type
Flammable liquids
Examples
Petrol, oil, paint, solvents
Suitable Extinguishers
Foam, CO2, dry powder
Fire Class
Class C
Fuel Type
Flammable gases
Examples
Propane, butane, natural gas
Suitable Extinguishers
Dry powder
Fire Class
Class F
Fuel Type
Cooking oils and fats
Examples
Deep fat fryers, cooking oil
Suitable Extinguishers
Wet chemical
Fire Class
Electrical
Fuel Type
Electrical equipment
Examples
Appliances, wiring, distribution boards
Suitable Extinguishers
CO2, dry powder, water mist

Class A Fires: Ordinary Combustibles

These involve everyday materials such as wood, paper, fabric and plastics. They’re what most people picture when they think of a fire. These fires typically produce steady flames. You can extinguish them with water, foam or water mist extinguishers.

Class B Fires: Flammable Liquids

Petrol, oil, paint and other liquid fuels create Class B fires. They spread quickly and produce intense heat.

Never use water on these fires. It can spread the burning liquid and make things much worse.

Class C Fires: Flammable Gases

Less common in domestic settings but essential to recognise, these involve gases like propane or butane. They burn with a steady flame at the gas source. You need to shut off the gas supply.

Class F Fires: Cooking Oils and Fats

Kitchen fires involving hot oil are hazardous. The oil can reach incredibly high temperatures. Adding water causes explosive spattering.

These require spec wet-chemical extinguishers.

Electrical Fires

These can look similar to other fire types but have an electrical source. They often start in appliances, wiring or distribution boards. Water mist extinguishers are suitable for use on electrical fires.

Your Immediate Response: The Critical First Moments

When you discover a fire, your response in those first moments can determine the outcome. Here’s what you should do.

Raise the Alarm

Before anything else, make sure everyone knows there’s a fire.

In a workplace, activate the fire alarm immediately. At home, shout to alert others and get them moving towards exits.

Assess the Situation Quickly

Take a few seconds to gauge:

  • How large is the fire?
  • What’s burning?
  • Is there smoke filling the room?
  • Do you have a clear escape route?
  • Is there a suitable fire extinguisher nearby?
This isn’t about being a hero. It’s about making a realistic assessment of whether you can safely do anything about the fire or if evacuation is your only option.

Call 999

Many people delay calling the fire brigade because they think they can handle it themselves. This is a mistake.

Even if you believe you can tackle the fire, get the professionals on their way. If the situation deteriorates, they’re already coming.

🔥 Fire Growth: The Facts

Research shows that modern fires in residential properties can reach flashover (when everything in a room ignites simultaneously) in as little as 3 minutes from ignition. This is significantly faster than fires from decades ago, mainly due to the prevalence of synthetic materials in modern furnishings. Once flashover occurs, survival becomes nearly impossible for anyone still in the room.

When to Fight and When to Flee

This is the most critical decision you’ll make. Getting it wrong can cost lives.

You Can Attempt to Tackle the Fire If… You Must Evacuate Immediately If…
The fire is small (no larger than a wastebasket). The fire is larger than you can safely manage.
It’s in the very early stages. Smoke is billowing down from the ceiling.
You have the correct type of extinguisher for the fuel involved. The fire is spreading rapidly.
You’ve been trained to use an extinguisher. You don’t have the right equipment.
You have a clear escape route behind you. You’re not confident in your ability to put it out.
The room isn’t filling with smoke. The heat is intense.
You feel confident you can put it out within seconds. Your escape route is threatened.
You Can Attempt to Tackle the Fire If…
The fire is small (no larger than a wastebasket).
It’s in the very early stages.
You have the correct type of extinguisher for the fuel involved.
You’ve been trained to use an extinguisher.
You have a clear escape route behind you.
The room isn’t filling with smoke.
You feel confident you can put it out within seconds.
You Must Evacuate Immediately If…
The fire is larger than you can safely manage.
Smoke is billowing down from the ceiling.
The fire is spreading rapidly.
You don’t have the right equipment.
You’re not confident in your ability to put it out.
The heat is intense.
Your escape route is threatened.

There’s no shame in leaving a fire to the professionals. That’s what they’re trained and equipped for. Your priority is always to get yourself and others to safety.  

The Role of Detection and Prevention

The best response to a fire is spotting it before it becomes dangerous. This is where proper smoke, fire and gas detection equipment becomes invaluable.

Smoke Alarms

Interconnected smoke alarms throughout your property provide early warning when you might not be near the source of the fire. They detect smoke particles in the air and sound an alarm, giving you precious time to respond.

Different types of sensors suit different locations. Optical sensors work well in living areas. Heat alarms are better for kitchens where cooking might trigger false alarms.

Heat Detectors

These activate when the temperature reaches a certain level or rises rapidly. They’re useful in areas where smoke alarms might cause nuisance alarms but where you still need fire detection.

Regular Testing and Maintenance

Detection equipment only works if it’s properly maintained. Testing your alarms weekly takes seconds and ensures they’ll work when you need them.

Professional fire alarm system servicing for commercial premises ensures your detection systems remain compliant and functional.

Replace batteries in standalone units at least annually. Replace the entire unit according to the manufacturer’s recommendations. Most modern alarms have a lifespan of 10 years.

Creating a Fire Response Plan

Having a plan before a fire occurs takes the panic out of the equation. Everyone in your household or workplace should know:

How to raise the alarm.

  • Where the exits are.
  • Where to meet outside.
  • Who’s responsible for checking specific areas (in workplaces).
  • Where fire extinguishers are located.
  • How to call 999.

Practice your evacuation regularly. In workplaces this is required by law, but it’s equally valuable in domestic settings. Children particularly benefit from knowing what to do without having to think about it in an emergency.

Common Fire Response Mistakes to Avoid  

Mistake Why Its Dangerous What To Do Instead
Using water on oil fires Causes explosive spattering. Use a wet chemical extinguisher or fire blanket.
Fighting fires alone No one to help if things go wrong. Always have someone with you who can call for help.
Blocking your exit route Traps you if fire spreads. Position yourself between the fire and the exit.
Ignoring smoke Smoke inhalation kills more people than flames. Evacuate immediately if smoke is building up.
Delaying the 999 call Fire brigade arrives too late. Call immediately upon discovering the fire.
Mistake
Using water on oil fires
Why Its Dangerous
Causes explosive spattering.
What To Do Instead
Use a wet chemical extinguisher or fire blanket.
Mistake
Fighting fires alone
Why Its Dangerous
No one to help if things go wrong.
What To Do Instead
Always have someone with you who can call for help.
Mistake
Blocking your exit route
Why Its Dangerous
Traps you if fire spreads.
What To Do Instead
Position yourself between the fire and the exit.
Mistake
Ignoring smoke
Why Its Dangerous
Smoke inhalation kills more people than flames.
What To Do Instead
Evacuate immediately if smoke is building up.
Mistake
Delaying the 999 call
Why Its Dangerous
Fire brigade arrives too late.
What To Do Instead
Call immediately upon discovering the fire.

Protecting Your Property and People

Fire safety isn’t just about responding to fires. It’s about creating an environment where fires are less likely to start and easier to manage if they do.

Keep potential fuel sources away from heat sources. Don’t overload electrical sockets. Store flammable materials properly. Keep escape routes clear of obstructions. Install appropriate fire safety equipment for your property type and use.

Regular maintenance of electrical systems, heating equipment and cooking appliances reduces the risk of fire starting in the first place. Many fires are preventable with basic housekeeping and awareness.

Taking Action

Understanding how to identify and respond to fires is essential knowledge. But it needs to be backed up with the right equipment and professional support.

Whether you need advice on the best detection systems for your property, want to arrange servicing for existing equipment or need guidance on creating a comprehensive fire safety plan, our team can help.

Get in touch with our fire safety experts to discuss your specific needs. We’ll help you create a safer environment for everyone who lives, works or visits your property.

Remember: the time to prepare for a fire is before it happens, not during the emergency itself.

★★★★★

“Easy to use website. I found the ideal produce to replace my smoke alarm sytem quickly and easily. Update to a modern version of my old system. Good price, fast delivery, easy to fit. Fixed to the original interlinked wiring in place. Very tidy, modern looking system. Would shop here again.”

Ian Beevers

★★★★★

“Great business to deal with. Good information about different fire extinguisher types etc. on websites and delivered the next day. Would certainy use again.”

Michael Harding

Mel Saunders

Head of Marketing

With over 20 years of experience in content writing, design and marketing, Mel now heads up the Content & Marketing Team at Safelincs. Having been in the fire safety industry for over 5 years, Mel has now developed a deep understanding of some of the critical issues facing the industry. Alongside her team, she aims to support the public with resources and information to help them improve fire safety at home, in the workplace or in 3rd sector organisations.

Latest Posts by Mel Saunders

What Is A Class D Fire?14th May 2026
What Is A Class F Fire?13th May 2026
Ionisation Smoke Alarms Buyers Guide12th May 2026

Why are fire drills important?

Fire drills aren’t just about compliance. They’re your chance to test whether your fire exit equipment actually works when you need it most. At Safelincs, we’ve seen that properly equipped fire exits, combined with regular drills, can make the difference between an orderly evacuation and dangerous confusion. When you conduct a fire drill, you’re not only training people but also stress testing every piece of hardware that stands between your building occupants and safety.

The connection between fire drills and fire exit equipment is straightforward. Drills reveal equipment failures before real emergencies strike. That panic bar that seemed fine during installation might stick when you test it. The illuminated exit sign that looks adequate in daylight could be invisible when the power fails during your evening drill.

This guide explores nine categories of fire exit equipment that should feature in your fire drill preparations. We’ll help you identify what works and what needs attention before a real emergency tests your systems.

What Fire Exit Equipment Should You Check During Fire Drills?

Fire drills provide the perfect opportunity to assess your fire exit equipment under realistic conditions. Government guidance recommends conducting at least one fire drill per year, though more frequent drills are advisable depending on your fire risk assessment and premises type. Each one should include checking that your exit hardware functions correctly.

Here’s what you need to consider across nine equipment categories.

Emergency Push Pads and Bolts

Emergency push pads are designed for commercial premises where trained staff understand the exit devices. These smaller units require more precision than panic bars. That makes them ideal for offices where employees have received proper fire safety training.

During fire drills, test whether your push pads release smoothly with a single action. Staff should be able to operate them instinctively, even under pressure. If anyone struggles during a drill, that’s your signal. You need to provide more training or consider whether panic bars would be more appropriate for your building.

Check that the vertical bolts slide freely and that the latches engage properly when the doors close. Mechanisms can seize if you don’t use them regularly.

Fire Drill Checklist for Push Pads

  • Single-action operation without hesitation.
  • Smooth bolt or latch movement.
  • Clear signage indicating push location.
  • No obstructions are preventing the door from opening.

Panic Bars with Latches or Bolts

Panic bars are essential for public buildings where occupants might not be familiar with the premises. These full-width bars open with body pressure. Perfect for situations where genuine panic could occur.

Your fire drills should confirm that anyone can operate panic bars effectively. Children, older adults or those with reduced mobility are included. Push the bar along its entire length to ensure consistent activation. Some units have wear points where the mechanism becomes less responsive. Drills help you spot these issues.

Verify that the door opens fully without catching. Check it returns to the closed, secured position when released.

If your panic bar is fitted with an outside access device, test both sides during drills. The internal release should work flawlessly. External security remains intact.  

External Access Devices

Outside access devices allow authorised entry through emergency exits without compromising security or safe escape provisions. These typically use keypads, key cylinders or proximity readers.

Fire drills reveal whether your access codes still work. They also show whether staff remember them under pressure. Test from both sides. Verify that the external entry functions correctly. Internal escape remains unrestricted.

Check that code locks haven’t developed sticky buttons and that key cylinders turn smoothly. These are simple issues that can cause serious problems when seconds count.

Consider whether the device location makes sense during evacuation. Can staff operate the external access if they need to guide visitors through exits? Your drill will expose any practical difficulties.

Fire Exit Door Security

Fire exit door alarms and anti-tamper devices discourage unauthorised use. They maintain emergency escape capability. During drills, these systems should activate as designed. Alert staff to door usage without creating confusion about whether there’s a genuine emergency.

Test that alarms sound at appropriate volumes. Check that key overrides or keypad controls work reliably. Battery-powered alarms should maintain sufficient charge. Wired systems should integrate properly with your alarm infrastructure.

Your drill provides the ideal moment to verify these functions. You’ll know whether the alarm activated appropriately when someone uses the fire exit.

If you’ve installed breakable tube devices or glass protection covers over door releases, drills help you assess whether staff understand how to operate them correctly. Misunderstanding during a real emergency could delay evacuation.

Equipment Type Whats To Test During Drills
Door alarms Volume, audibility, battery life and reset function.
Keypad controls Code memory, button responsiveness and manager override.
Break glass units Staff understanding, replacement tube availability.
Call point protectors Ease of opening, hinge function and alarm integration.
Equipment Type
Door alarms
Whats To Test During Drills
Volume, audibility, battery life and reset function.
Equipment Type
Keypad controls
Whats To Test During Drills
Code memory, button responsiveness and manager override.
Equipment Type
Break glass units
Whats To Test During Drills
Staff understanding, replacement tube availability.
Equipment Type
Call point protectors
Whats To Test During Drills
Ease of opening, hinge function and alarm integration.

Magnetic Locks for Access Control

Magnetic locks secure doors during regular operation. They release automatically when the fire alarm sounds. Your fire drills must confirm this fail-safe operation every single time. There’s no room for error with magnetic locking systems.

When you trigger your alarm during a drill, magnetic locks should release immediately. They must remain released throughout the evacuation. Test that the manual override buttons work from both sides. Check that break-glass units provide a reliable manual release. If your system includes time-delayed access, verify that emergency override functions supersede normal delays.

Watch for doors that fail to release or that re-lock before the drill concludes. These failures indicate power supply issues, faulty control systems or inadequate integration with your fire alarm panel. All serious concerns that drills help you identify before they endanger lives.

Illuminated Emergency Fire Exit Signs

Illuminated fire exit signs remain visible when mains power fails. They use battery backup to guide people to safety. Fire drills conducted during different lighting conditions test whether your signs perform as required.

Schedule at least one drill during evening hours or in darkened conditions to assess sign visibility. Emergency lighting should activate automatically when power fails. Signs should remain illuminated for their full backup duration. Typically one to three hours.

Check that directional arrows accurately indicate the escape route. Verify that signs remain visible through smoke. That’s why mounting height and positioning matter so much.

LED signs offer advantages for visibility and reliability. They typically have lower energy consumption and longer life than older fluorescent units. If your drill reveals poor visibility, dimming or failed backup batteries, that’s your prompt to upgrade before visibility becomes critical during an actual emergency.

Fire Exit Door Signs

Self-adhesive fire exit door signs seem basic. But they play a crucial role in guiding people during evacuations. Photoluminescent signs absorb ambient light and glow in the dark without requiring power or batteries.

During fire drills, especially those conducted in low light, assess whether your door signs provide adequate guidance. Are they positioned at eye level where people naturally look? Do they remain visible as people approach the exit?

Photoluminescent materials need adequate light exposure to charge effectively. Signs in poorly lit areas won’t glow sufficiently when required.

Replace any signs that have become damaged, discoloured or obscured by furniture or displays. Your drill observations should guide sign placement decisions. Evacuation routes must remain clear and well-marked from any starting point in the building.

Photoluminescent Escape Route Marking

Photoluminescent escape route marking systems provide continuous guidance along evacuation paths. They’re particularly valuable in buildings where visitors might not know the layout. These systems charge under standard lighting and glow for several hours when it gets dark.

Fire drills help you evaluate whether your marking system provides sufficient continuous guidance. Walk the escape route during your drill and note any gaps in marking that could cause people to become disoriented.

Pay attention to direction changes, doorways and stairwells. Areas where confusion commonly occurs during evacuations.

Check that floor markings remain intact and unobscured. High traffic areas can wear down adhesive strips. Cleaning routines might damage some marking systems. Your regular drills provide ongoing assessment of whether your photoluminescent system still offers the continuous guidance you installed it to provide.

Key Boxes and Key Guards

Key boxes store emergency exit-door keys. They allow authorised access and maintain security. These are particularly relevant for premises that require locked external doors, balanced against emergency escape requirements.

Your fire drills should include testing key box accessibility and key functionality. Can authorised staff access keys quickly under pressure? Do the stored keys actually open the intended doors? These seem like obvious questions. But we’ve encountered situations where keys were stored in the wrong box or where replacement doors weren’t matched with corresponding key updates.

Position key boxes where they’re accessible during evacuations but secure from casual tampering. Break glass key boxes should open easily when needed. Test this during drills to ensure the glass breaks cleanly without risk of injury and that the keys remain accessible once the glass is broken.

Equipment Category Primary Function Drill Testing Priority Common Failure Points
Emergency Push Pads Secure exit for trained staff Smooth single-action release Seized mechanisms, unclear signage
Panic Bars Public building rapid exit Universal ease of operation Inconsistent activation, worn components
External Access Devices Controlled re-entry Code memory, smooth operation Sticky buttons, forgotten codes
Fire Exit Alarms Unauthorised use deterrent Alarm volume, reset function Dead batteries, false alarm sensitivity
Magnetic Locks Access control with a fail-safe Automatic alarm release Failed integration, delayed release
Illuminated Signs Powered exit guidance Battery backup, visibility Depleted batteries, poor positioning
Door Signs Unpowered exit marking Photoluminescent charge Wear, inadequate ambient light exposure
Route Marking Continuous path guidance Gap identification Adhesive failure, obstruction
Key Boxes Emergency key access Key availability, glass breakage Wrong keys, inaccessible location
Equipment Category
Emergency Push Pads
Primary Function
Secure exit for trained staff
Drill Testing Priority
Smooth single-action release
Common Failure Points
Seized mechanisms, unclear signage
Equipment Category
Panic Bars
Primary Function
Public building rapid exit
Drill Testing Priority
Universal ease of operation
Common Failure Points
Inconsistent activation, worn components
Equipment Category
External Access Devices
Primary Function
Controlled re-entry
Drill Testing Priority
Code memory, smooth operation
Common Failure Points
Sticky buttons, forgotten codes
Equipment Category
Fire Exit Alarms
Primary Function
Unauthorised use deterrent
Drill Testing Priority
Alarm volume, reset function
Common Failure Points
Dead batteries, false alarm sensitivity
Equipment Category
Magnetic Locks
Primary Function
Access control with a fail-safe
Drill Testing Priority
Automatic alarm release
Common Failure Points
Failed integration, delayed release
Equipment Category
Illuminated Signs
Primary Function
Powered exit guidance
Drill Testing Priority
Battery backup, visibility
Common Failure Points
Depleted batteries, poor positioning
Equipment Category
Door Signs
Primary Function
Unpowered exit marking
Drill Testing Priority
Photoluminescent charge
Common Failure Points
Wear, inadequate ambient light exposure
Equipment Category
Route Marking
Primary Function
Continuous path guidance
Drill Testing Priority
Gap identification
Common Failure Points
Adhesive failure, obstruction
Equipment Category
Key Boxes
Primary Function
Emergency key access
Drill Testing Priority
Key availability, glass breakage
Common Failure Points
Wrong keys, inaccessible location

Making Fire Drills Work for Your Fire Exit Equipment

Fire drills aren’t just training exercises. They’re diagnostic tools revealing how your fire exit equipment performs under realistic conditions. Each drill provides data about equipment reliability, staff readiness and building layout effectiveness.

Record your observations systematically. Note any equipment that doesn’t function as expected and any staff confusion about exit procedures.

The Regulatory Reform (Fire Safety) Order 2005 requires that appropriate procedures, including safety drills, be established and maintained. Government guidance recommends a minimum of one fire drill annually, but conducting drills more frequently builds genuine muscle memory. Quarterly or even monthly drills provide more opportunities to assess equipment performance.

Vary your drill scenarios. Block different exits to test alternative routes. Conduct drills during different shifts to ensure all staff are trained. Schedule occasional drills in the dark to assess the adequacy of emergency lighting.

When your fire drill reveals equipment issues, you’ve gained invaluable information. Sticky mechanisms, insufficient lighting, unclear signage or access problems. These are vulnerabilities that need addressing. This is precisely what drills are designed to achieve. Identifying weaknesses before they matter in a genuine emergency.

Our comprehensive range of fire exit equipment includes everything you need to create safe, compliant evacuation routes backed by reliable hardware. Whether you’re fitting out a new building, upgrading existing equipment or replacing components identified as problematic during fire drills, we provide the quality products and expert advice that help you maintain genuinely effective emergency preparedness.

Browse our fire exit equipment category to find the right solutions for your premises. Or contact our specialist team for personalised advice on creating exit systems that perform flawlessly when they’re needed most.

★★★★★

“Easy to use website. I found the ideal produce to replace my smoke alarm sytem quickly and easily. Update to a modern version of my old system. Good price, fast delivery, easy to fit. Fixed to the original interlinked wiring in place. Very tidy, modern looking system. Would shop here again.”

Ian Beevers

★★★★★

“Great business to deal with. Good information about different fire extinguisher types etc. on websites and delivered the next day. Would certainy use again.”

Michael Harding